DIY Asymmetrical Fireplace Wall Feature

I was thrilled to buy my house in the San Diego area a couple years ago, but the interiors didn't match my style at all. Everything was old and brown, from the carpet to the walls. So to make the house feel more like my home, I spent countless hours renovating.
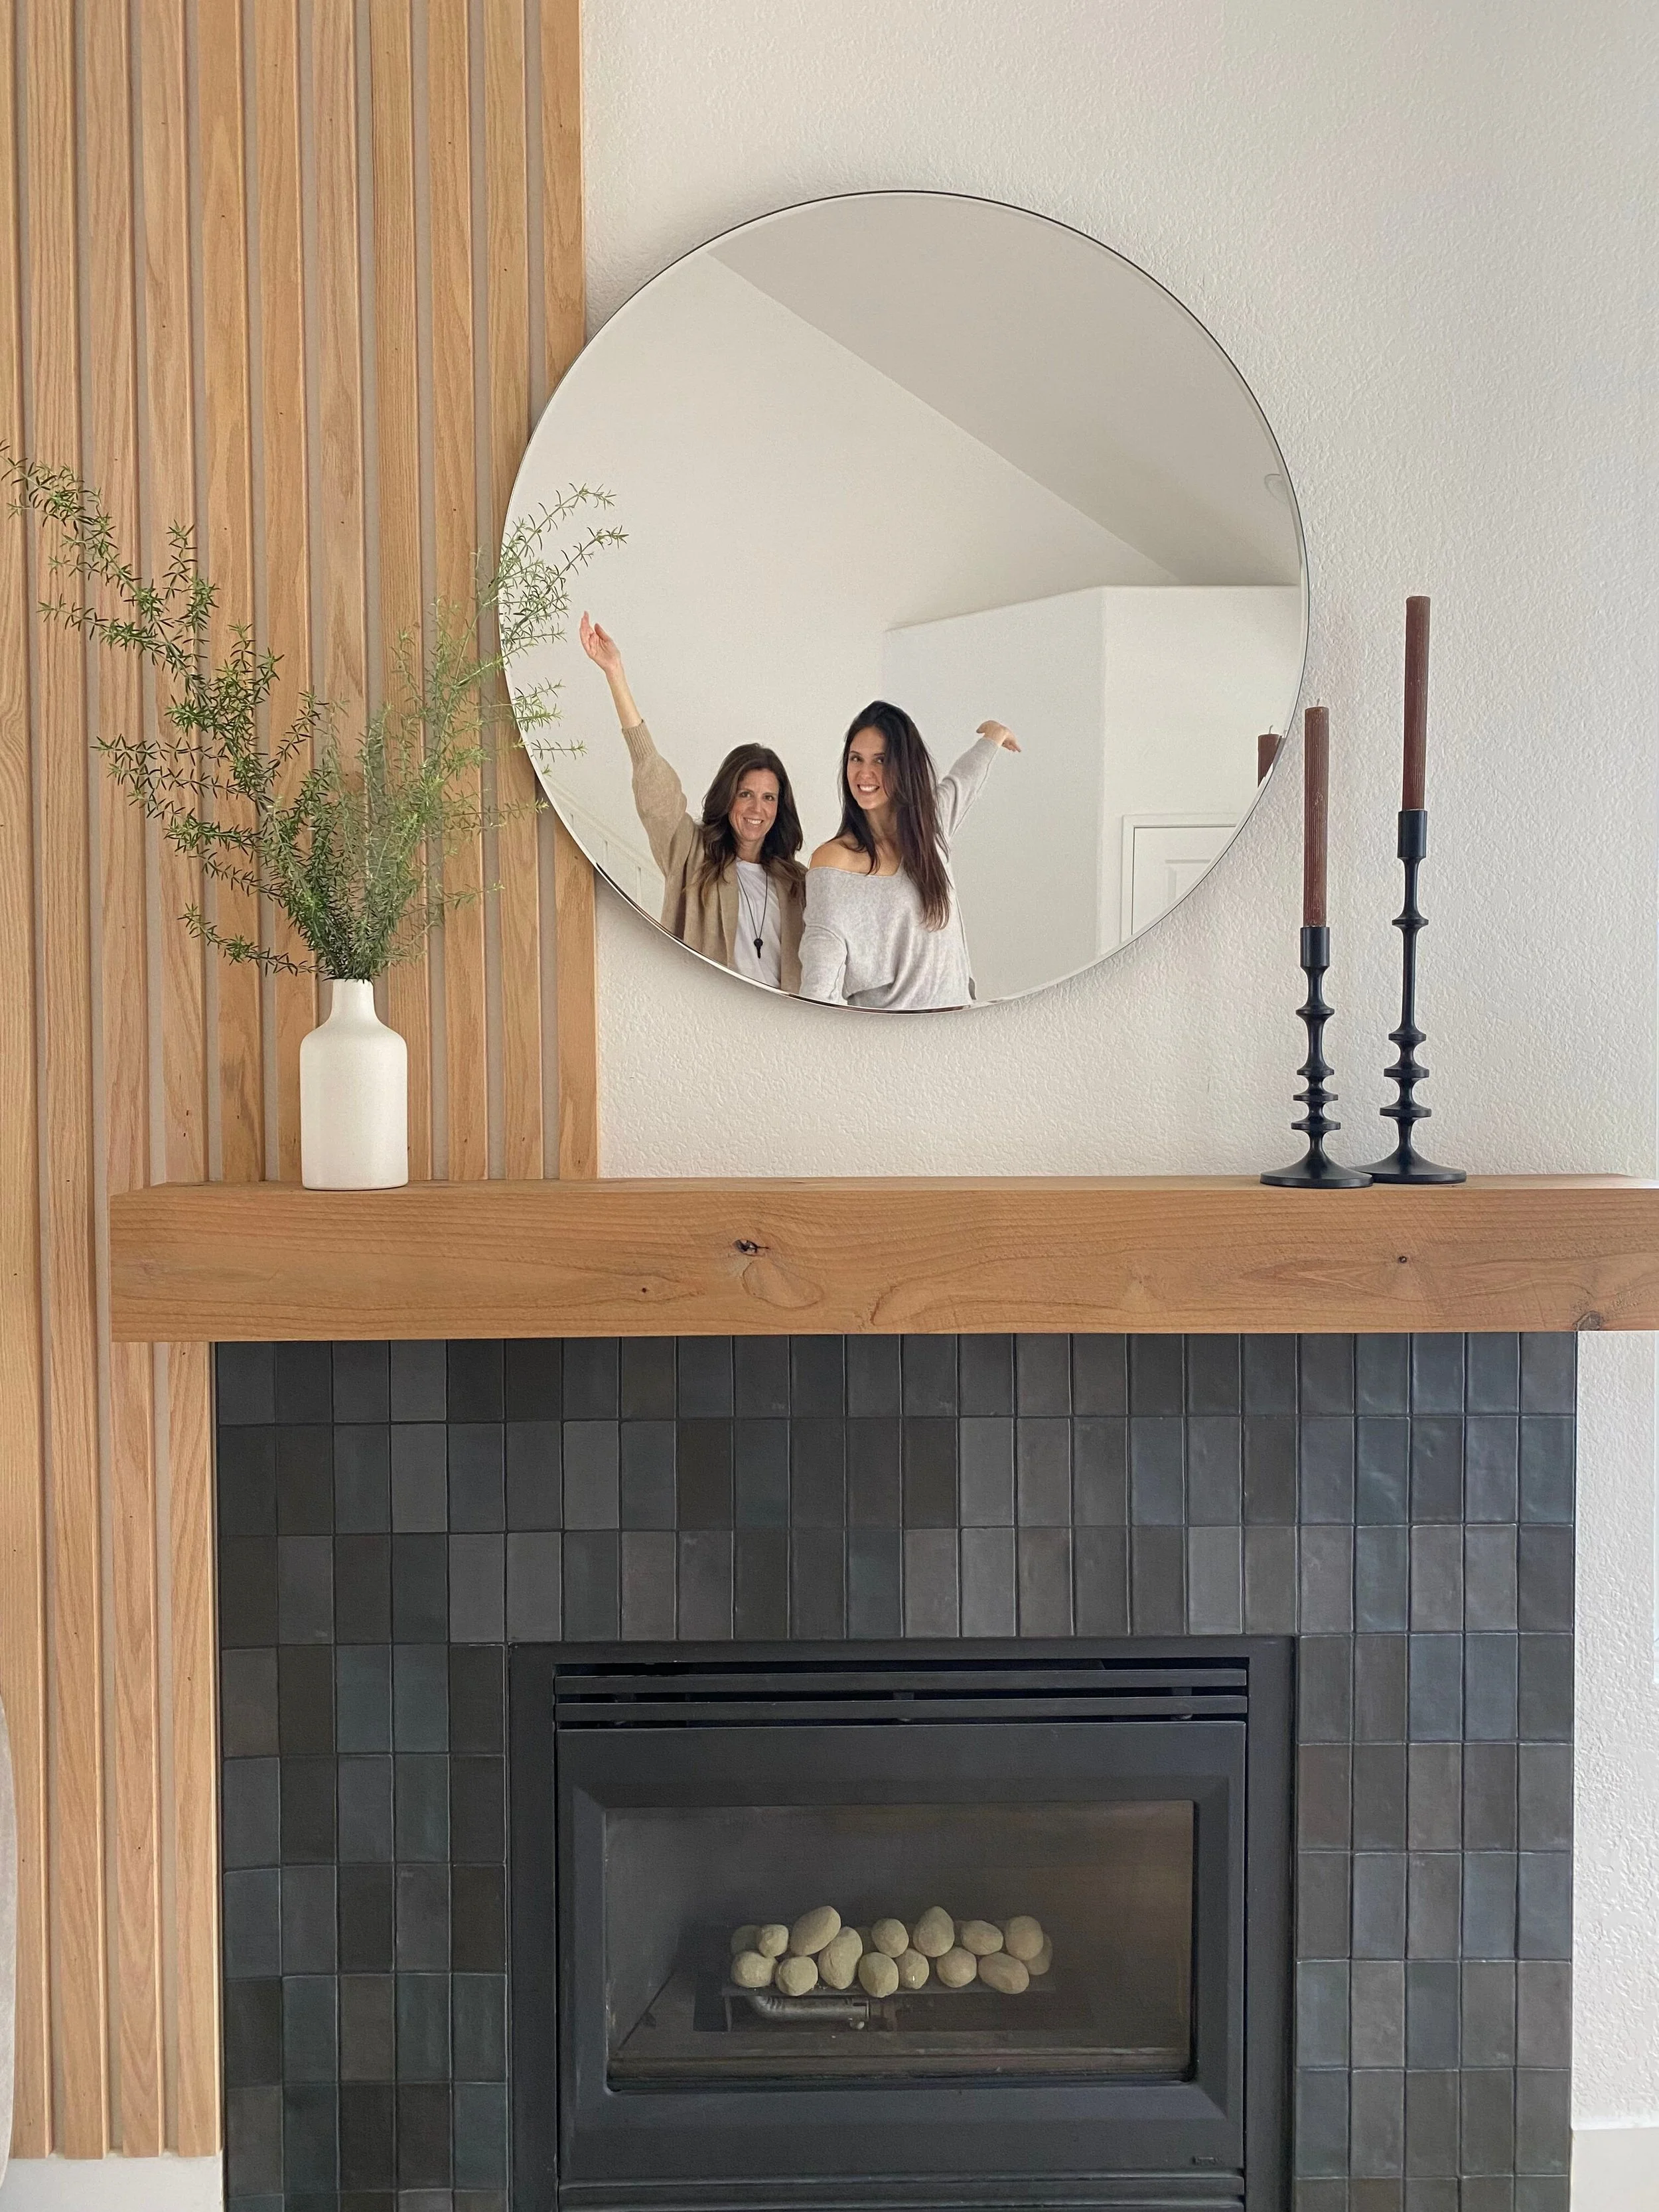
The fireplace mantel and tile surround were two of the first things I ripped off the walls. Like the rest of the house, they were brown and so hideous I couldn't stand looking at them. But much to my dismay, I struggled to find a replacement tile that I liked. Every time we went to the tile store, I'd bring samples home, but I'd never choose one. (Selena and I would joke that my house is where tile goes to die 😂.) Nothing seemed right, and I just couldn't commit to a tile I didn't absolutely love. Adding to my hesitancy, the fireplace insert wasn’t centered with the wall, but rather closer to the right side than the left. It looked lopsided and added too much weight to one half of the living room.
After months of deliberation, I finally found the perfect tile. And we also devised a plan to help balance the fireplace wall. This DIY is a total showstopper, and we're thrilled to reveal our process so you can get the look, too!
Black Zellige Tile Fireplace Surround

First, let me explain why I took forever to choose the tile. Part of the issue was that the fireplace insert was flush with the wall. A thick, heavy tile would have looked too bulky next to the insert's slim profile. That narrowed my options to only thin tiles. Also, my new renovations were all white: white walls, white trim, and light-toned wood. I thought I wanted to put white tile around the fireplace, as well. But samples always looked washed out and bland against the white walls.
Surprisingly, the tiles I chose are deep and saturated. They’re handmade and hand-glazed black zellige tiles in assorted dark tones with lots of differentiation: some are bluish, some are gray, and others are jet black. I was also drawn to their shape; ultimately, I wanted to line the tiles in neat, clean rows, and these were perfect for stacking.

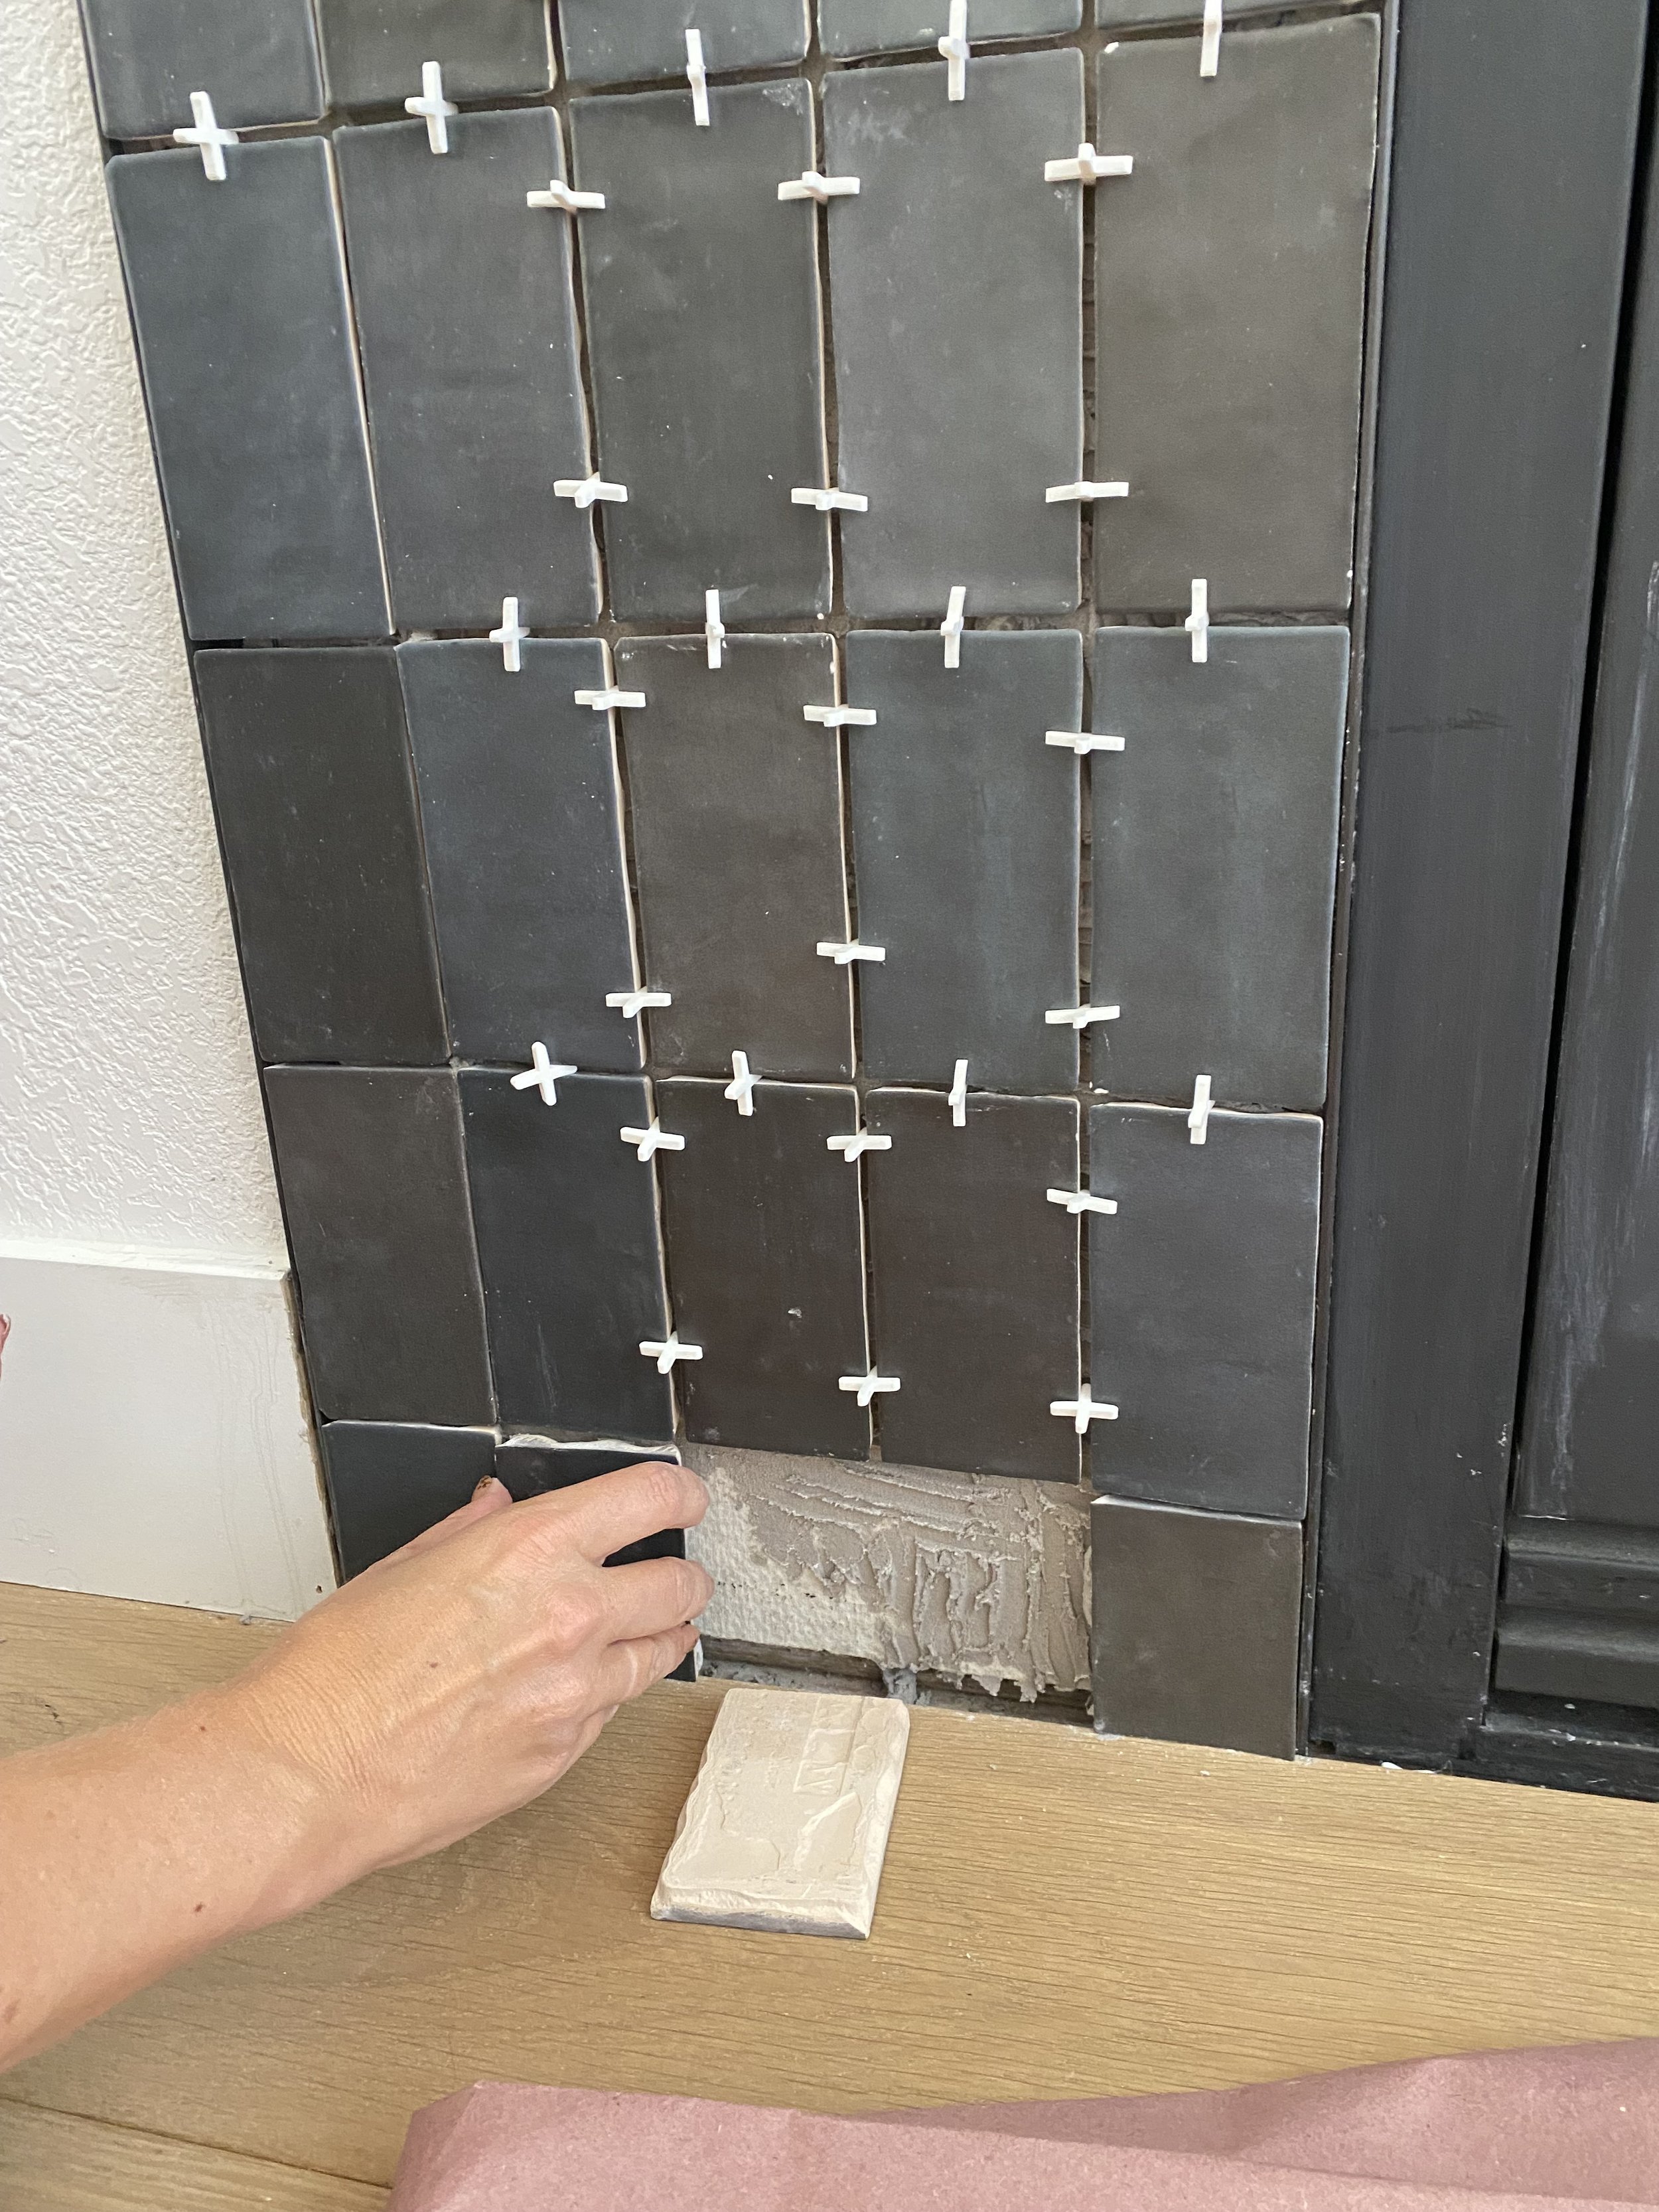
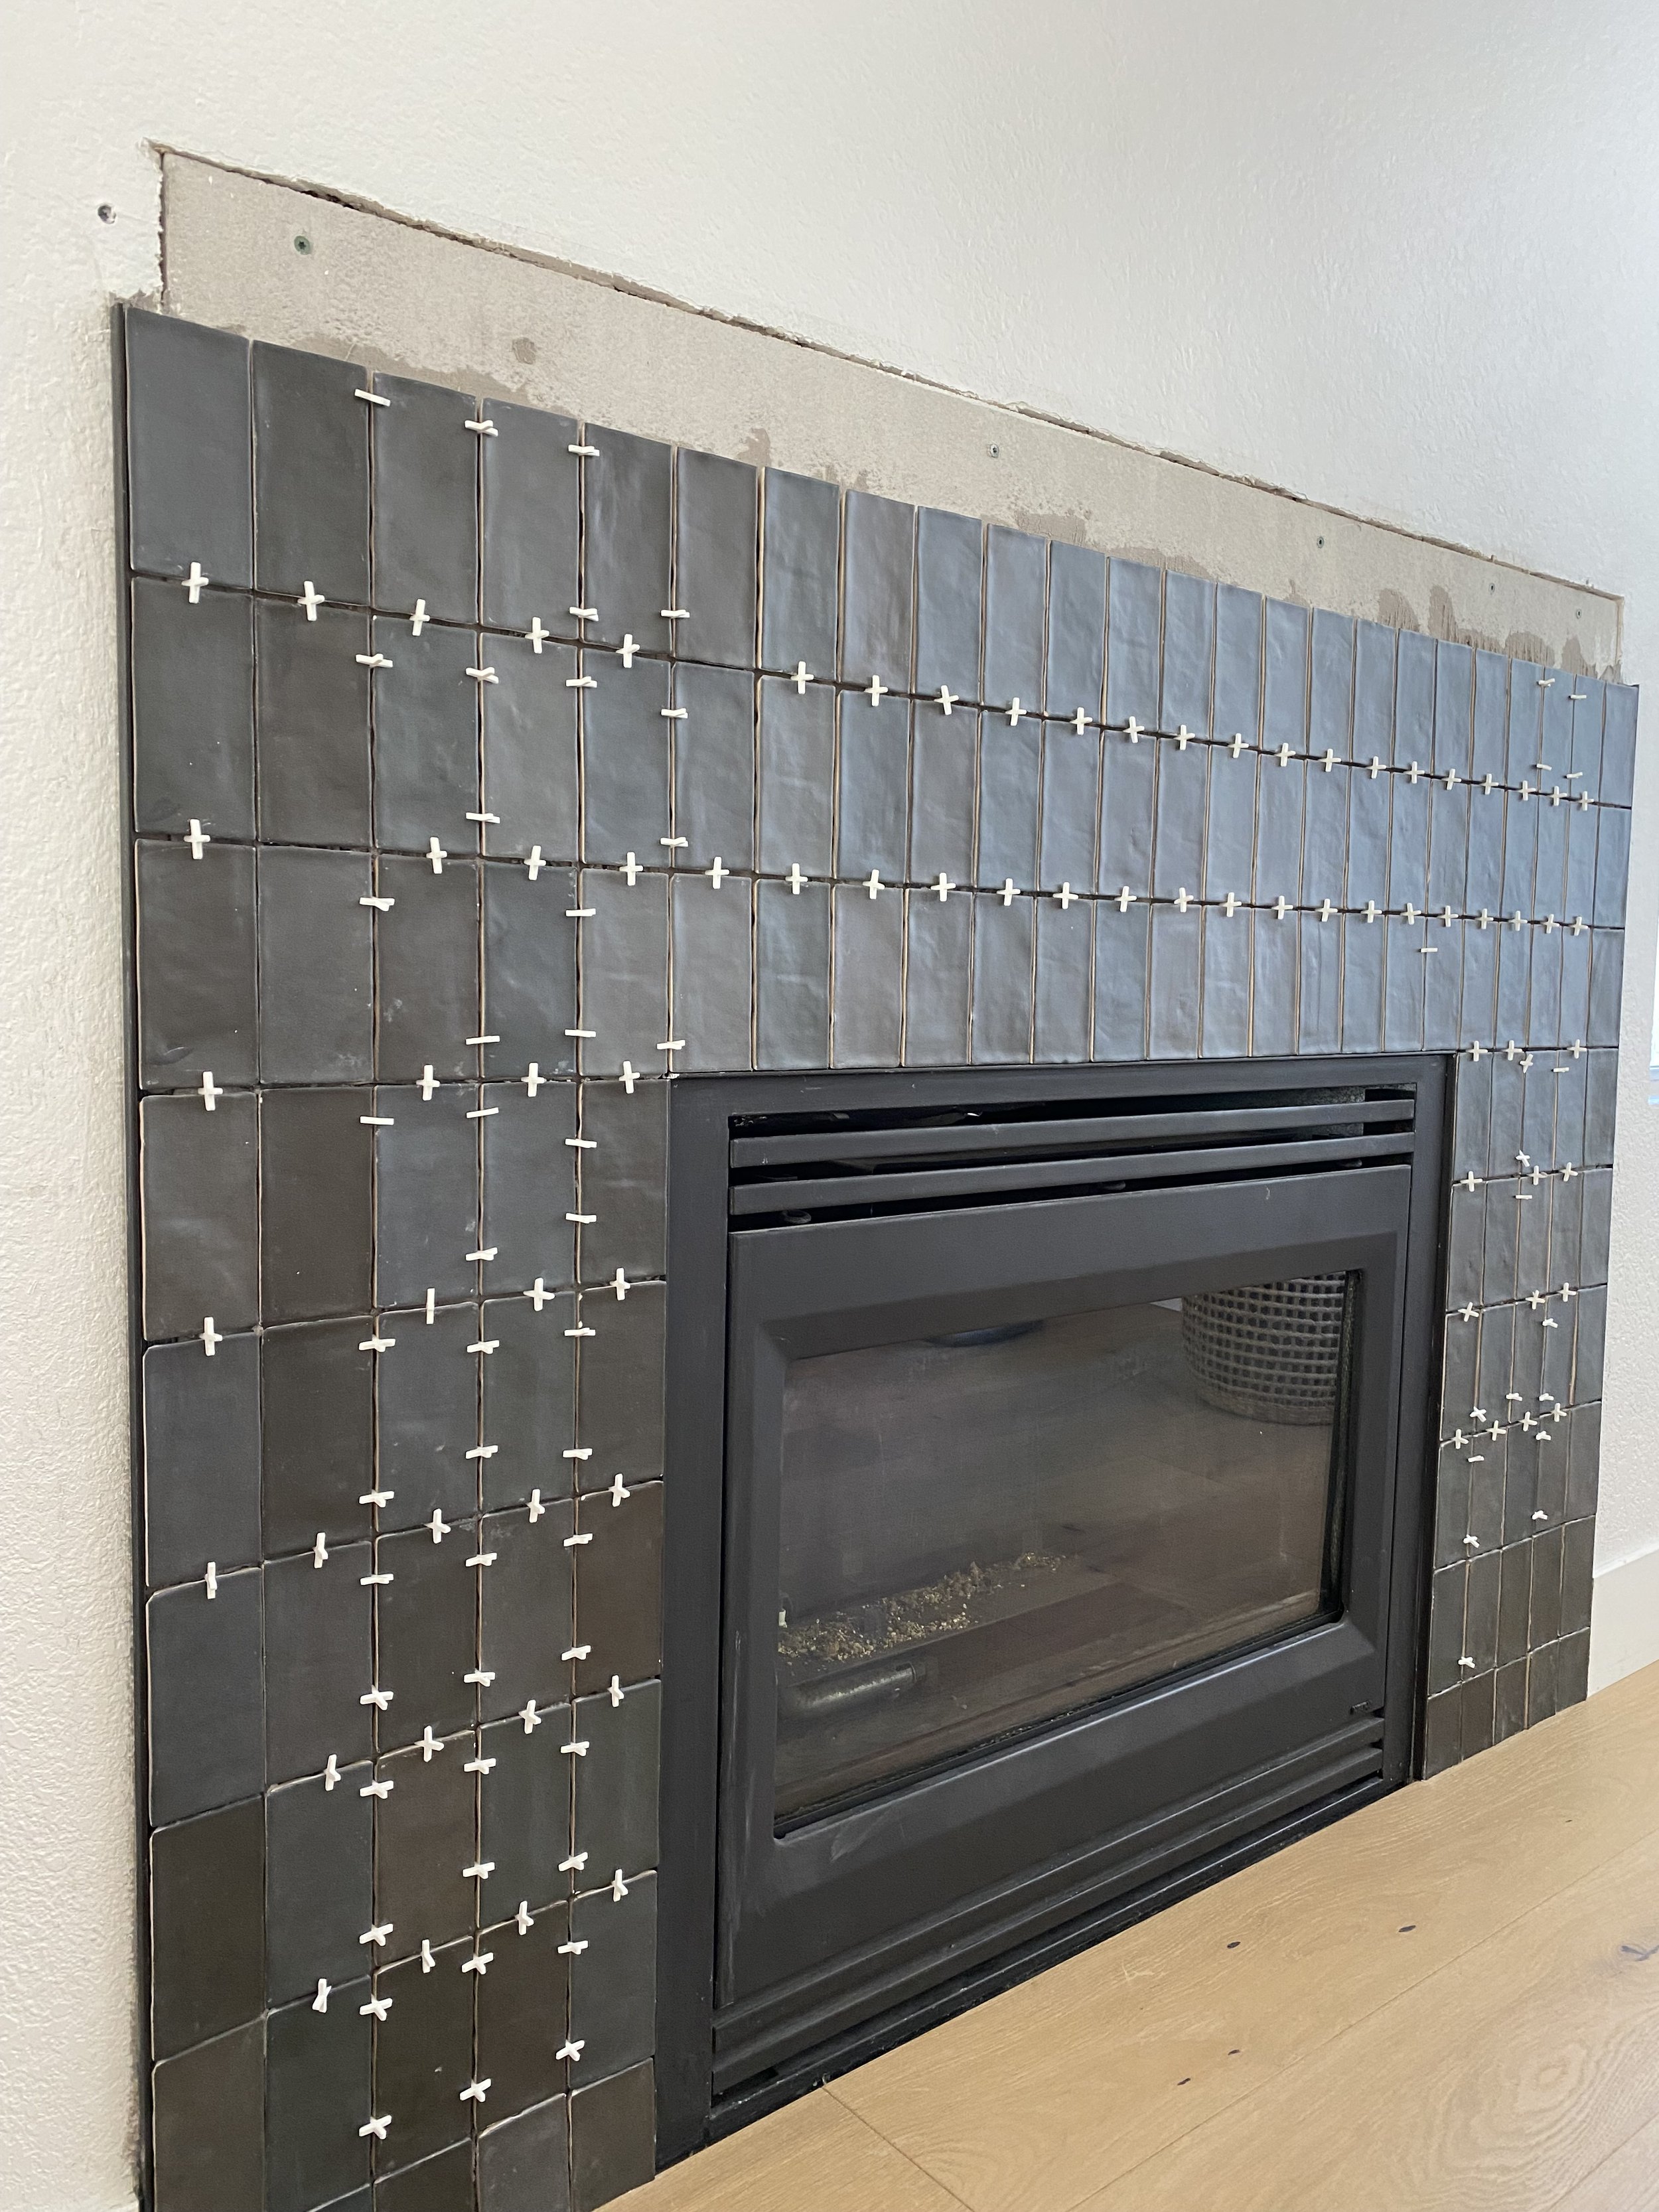
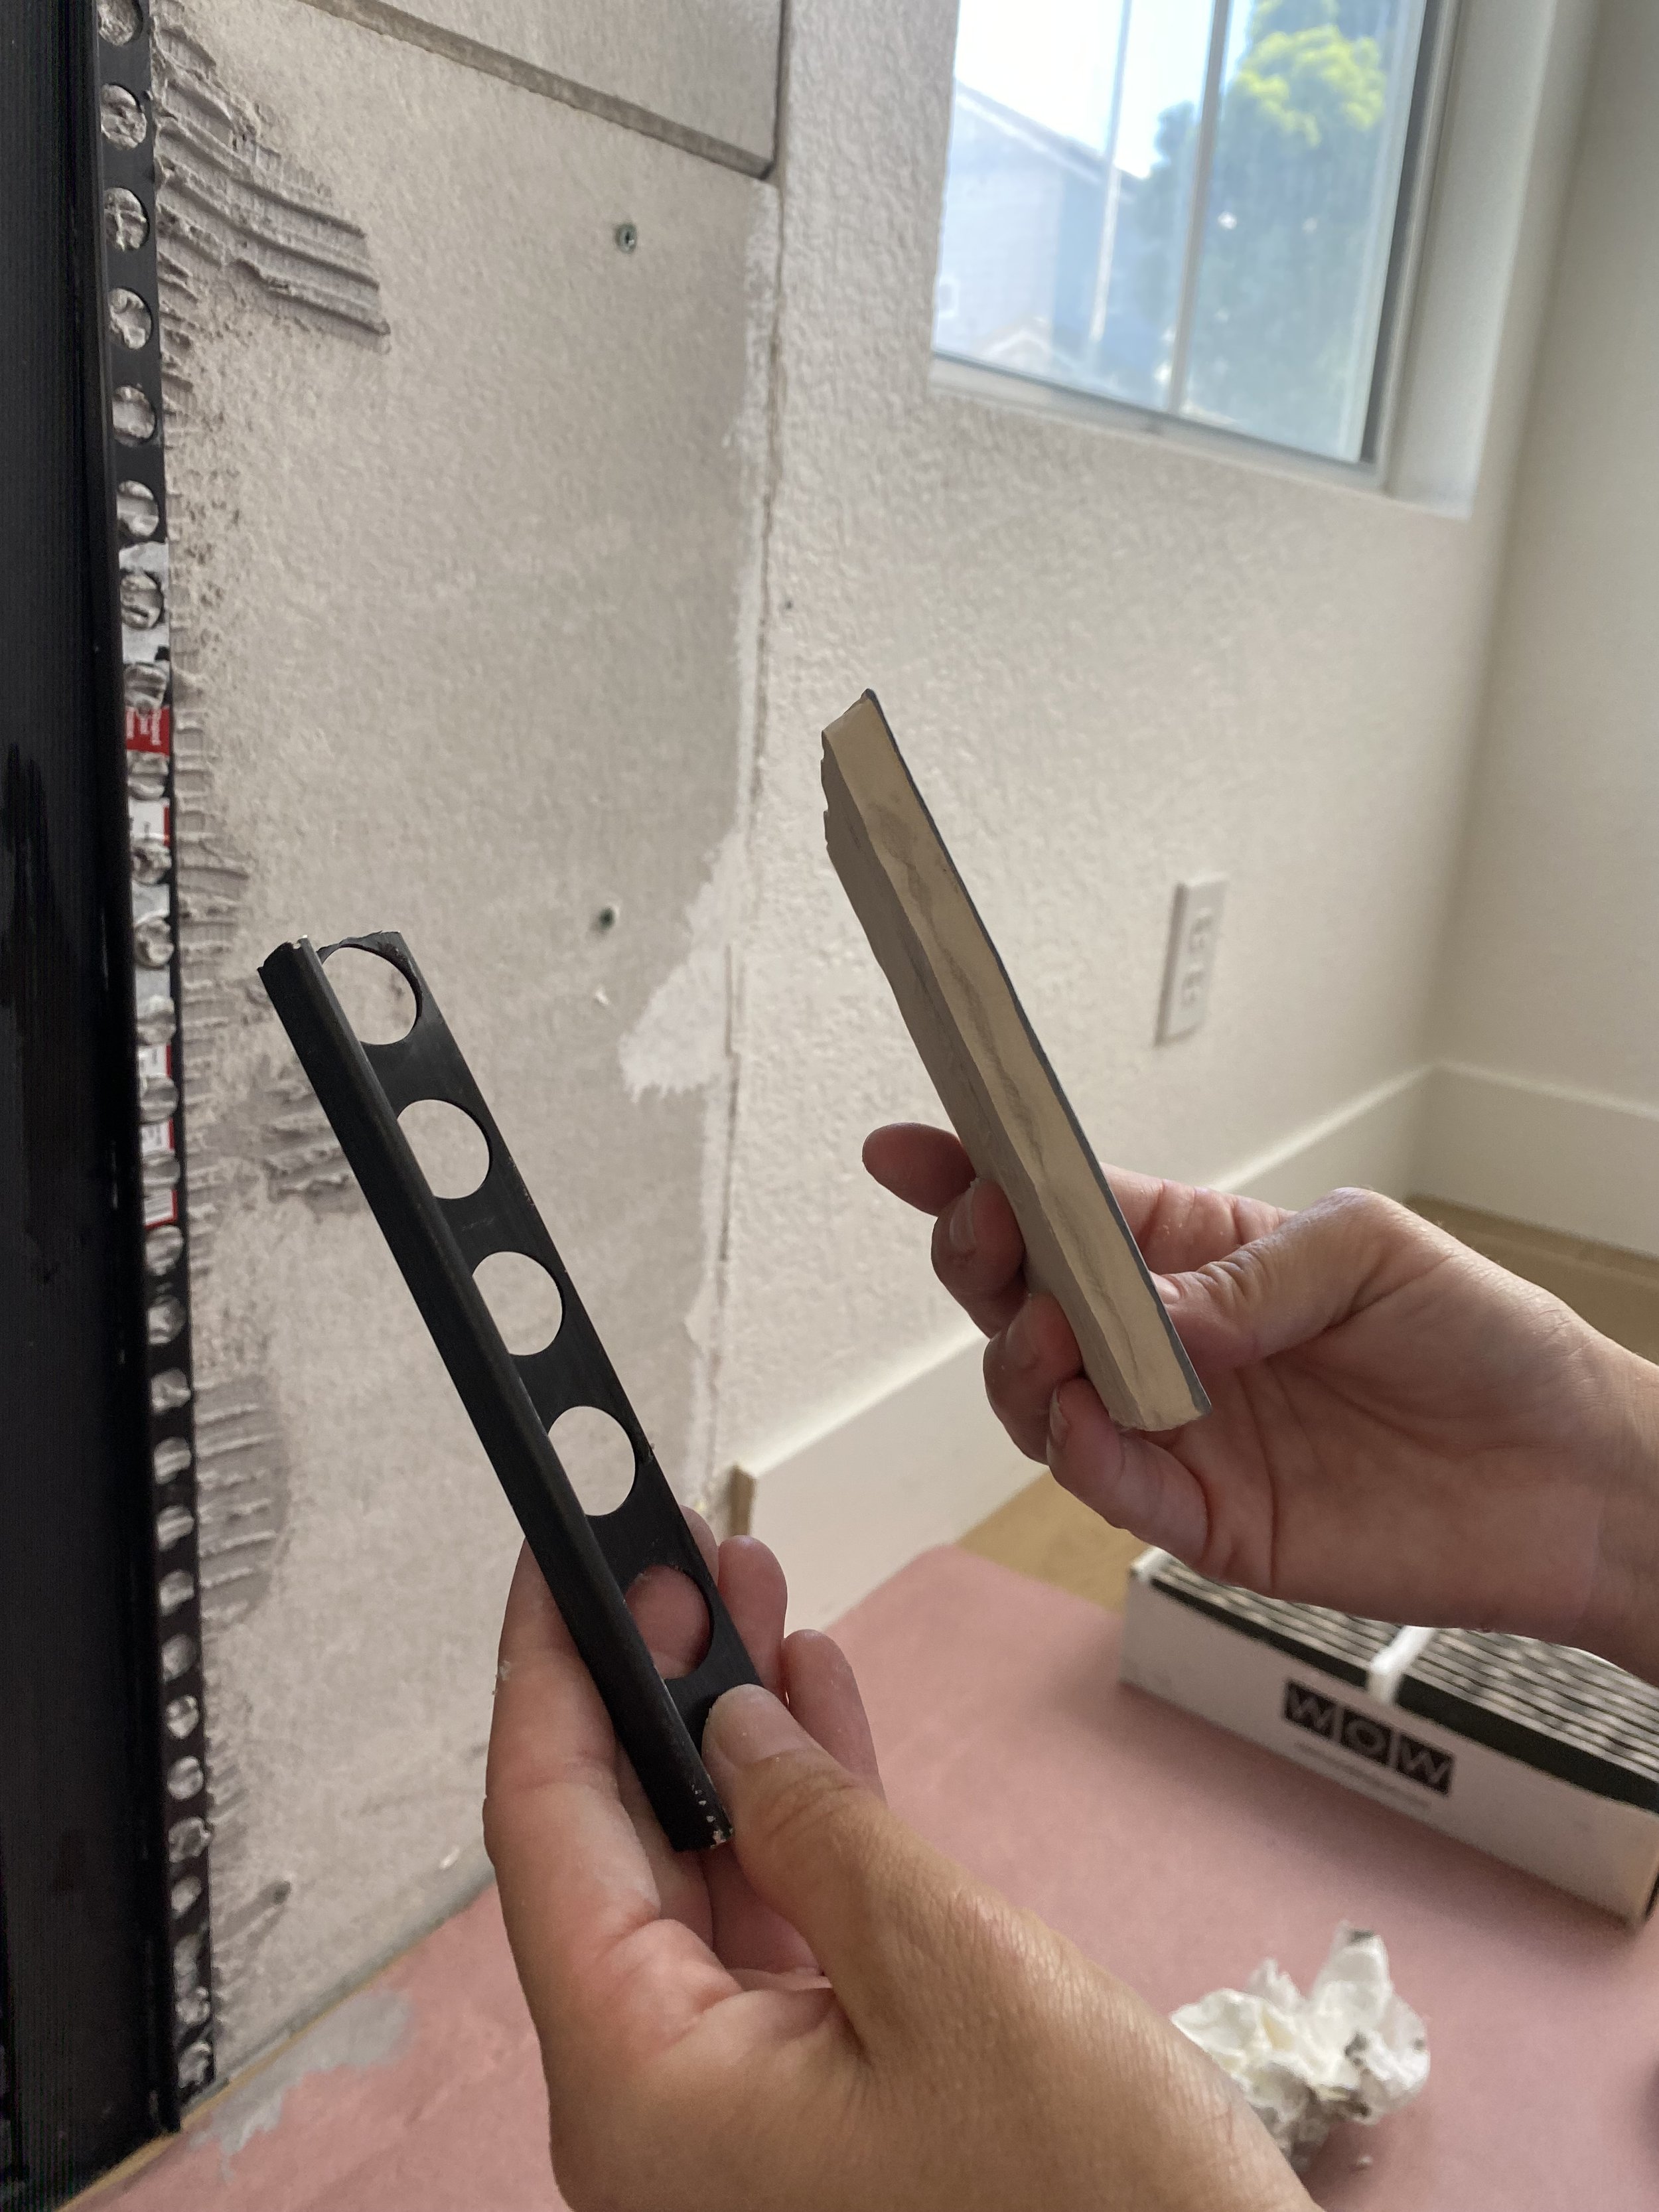
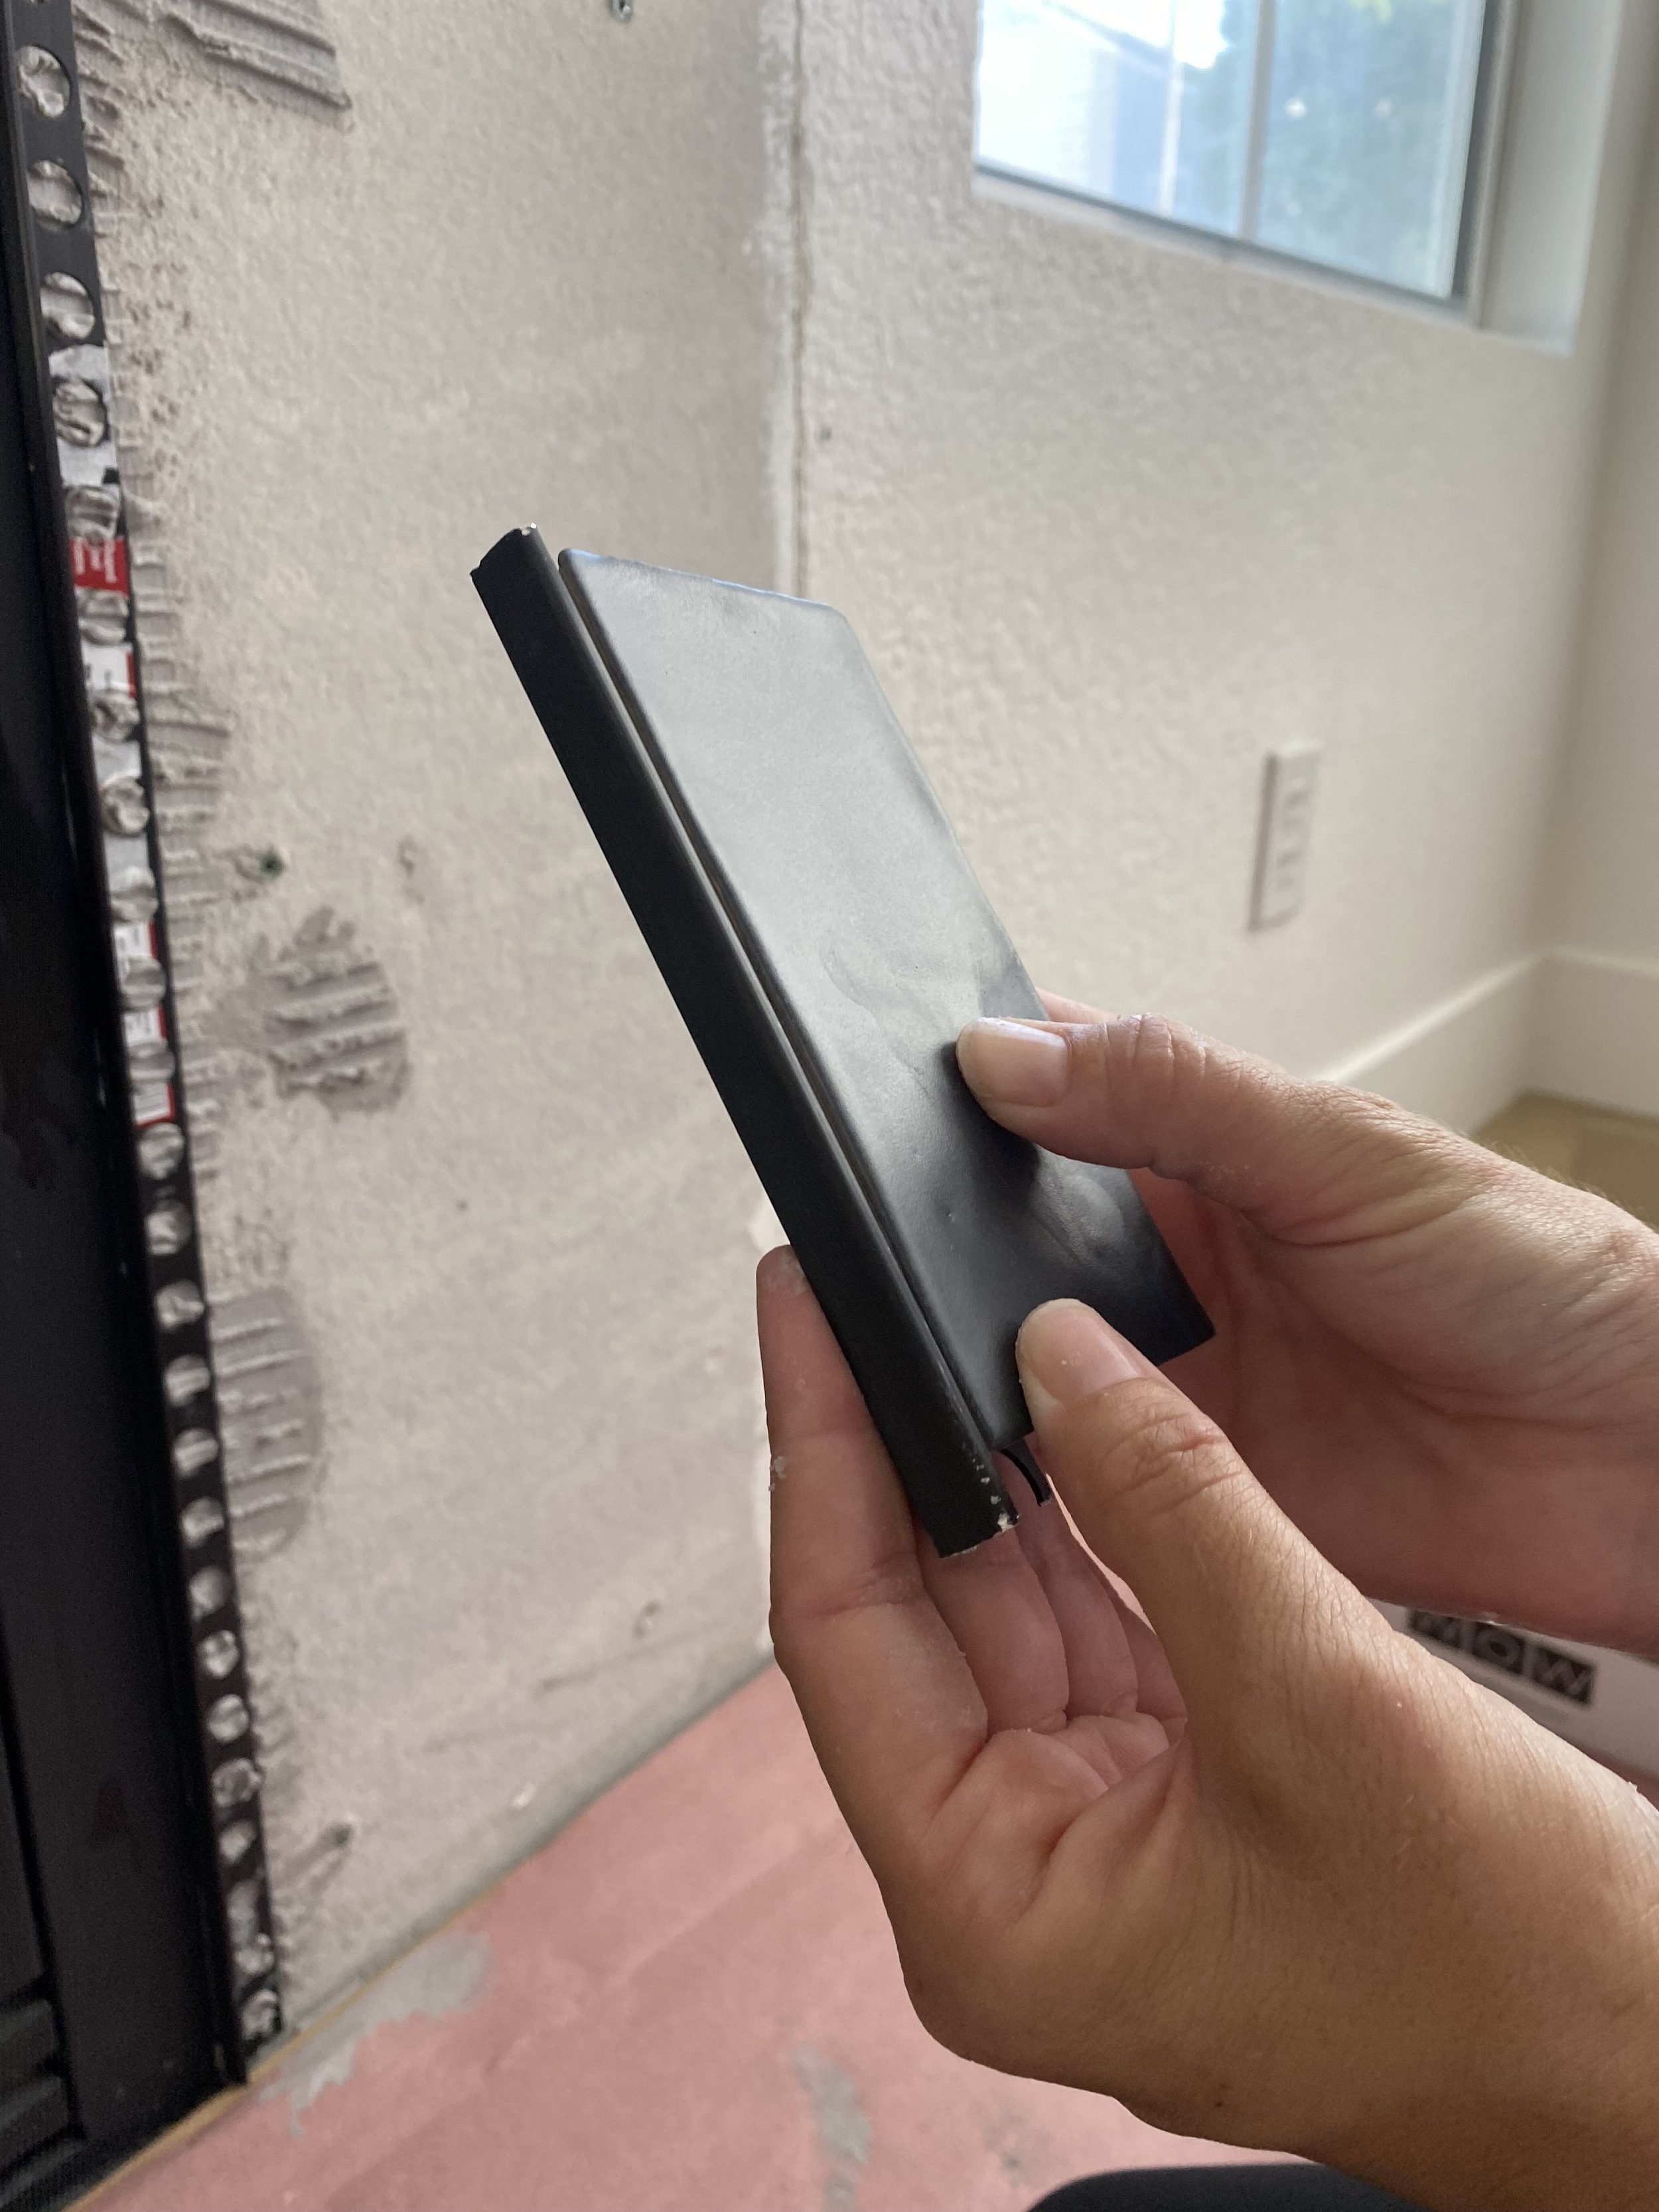
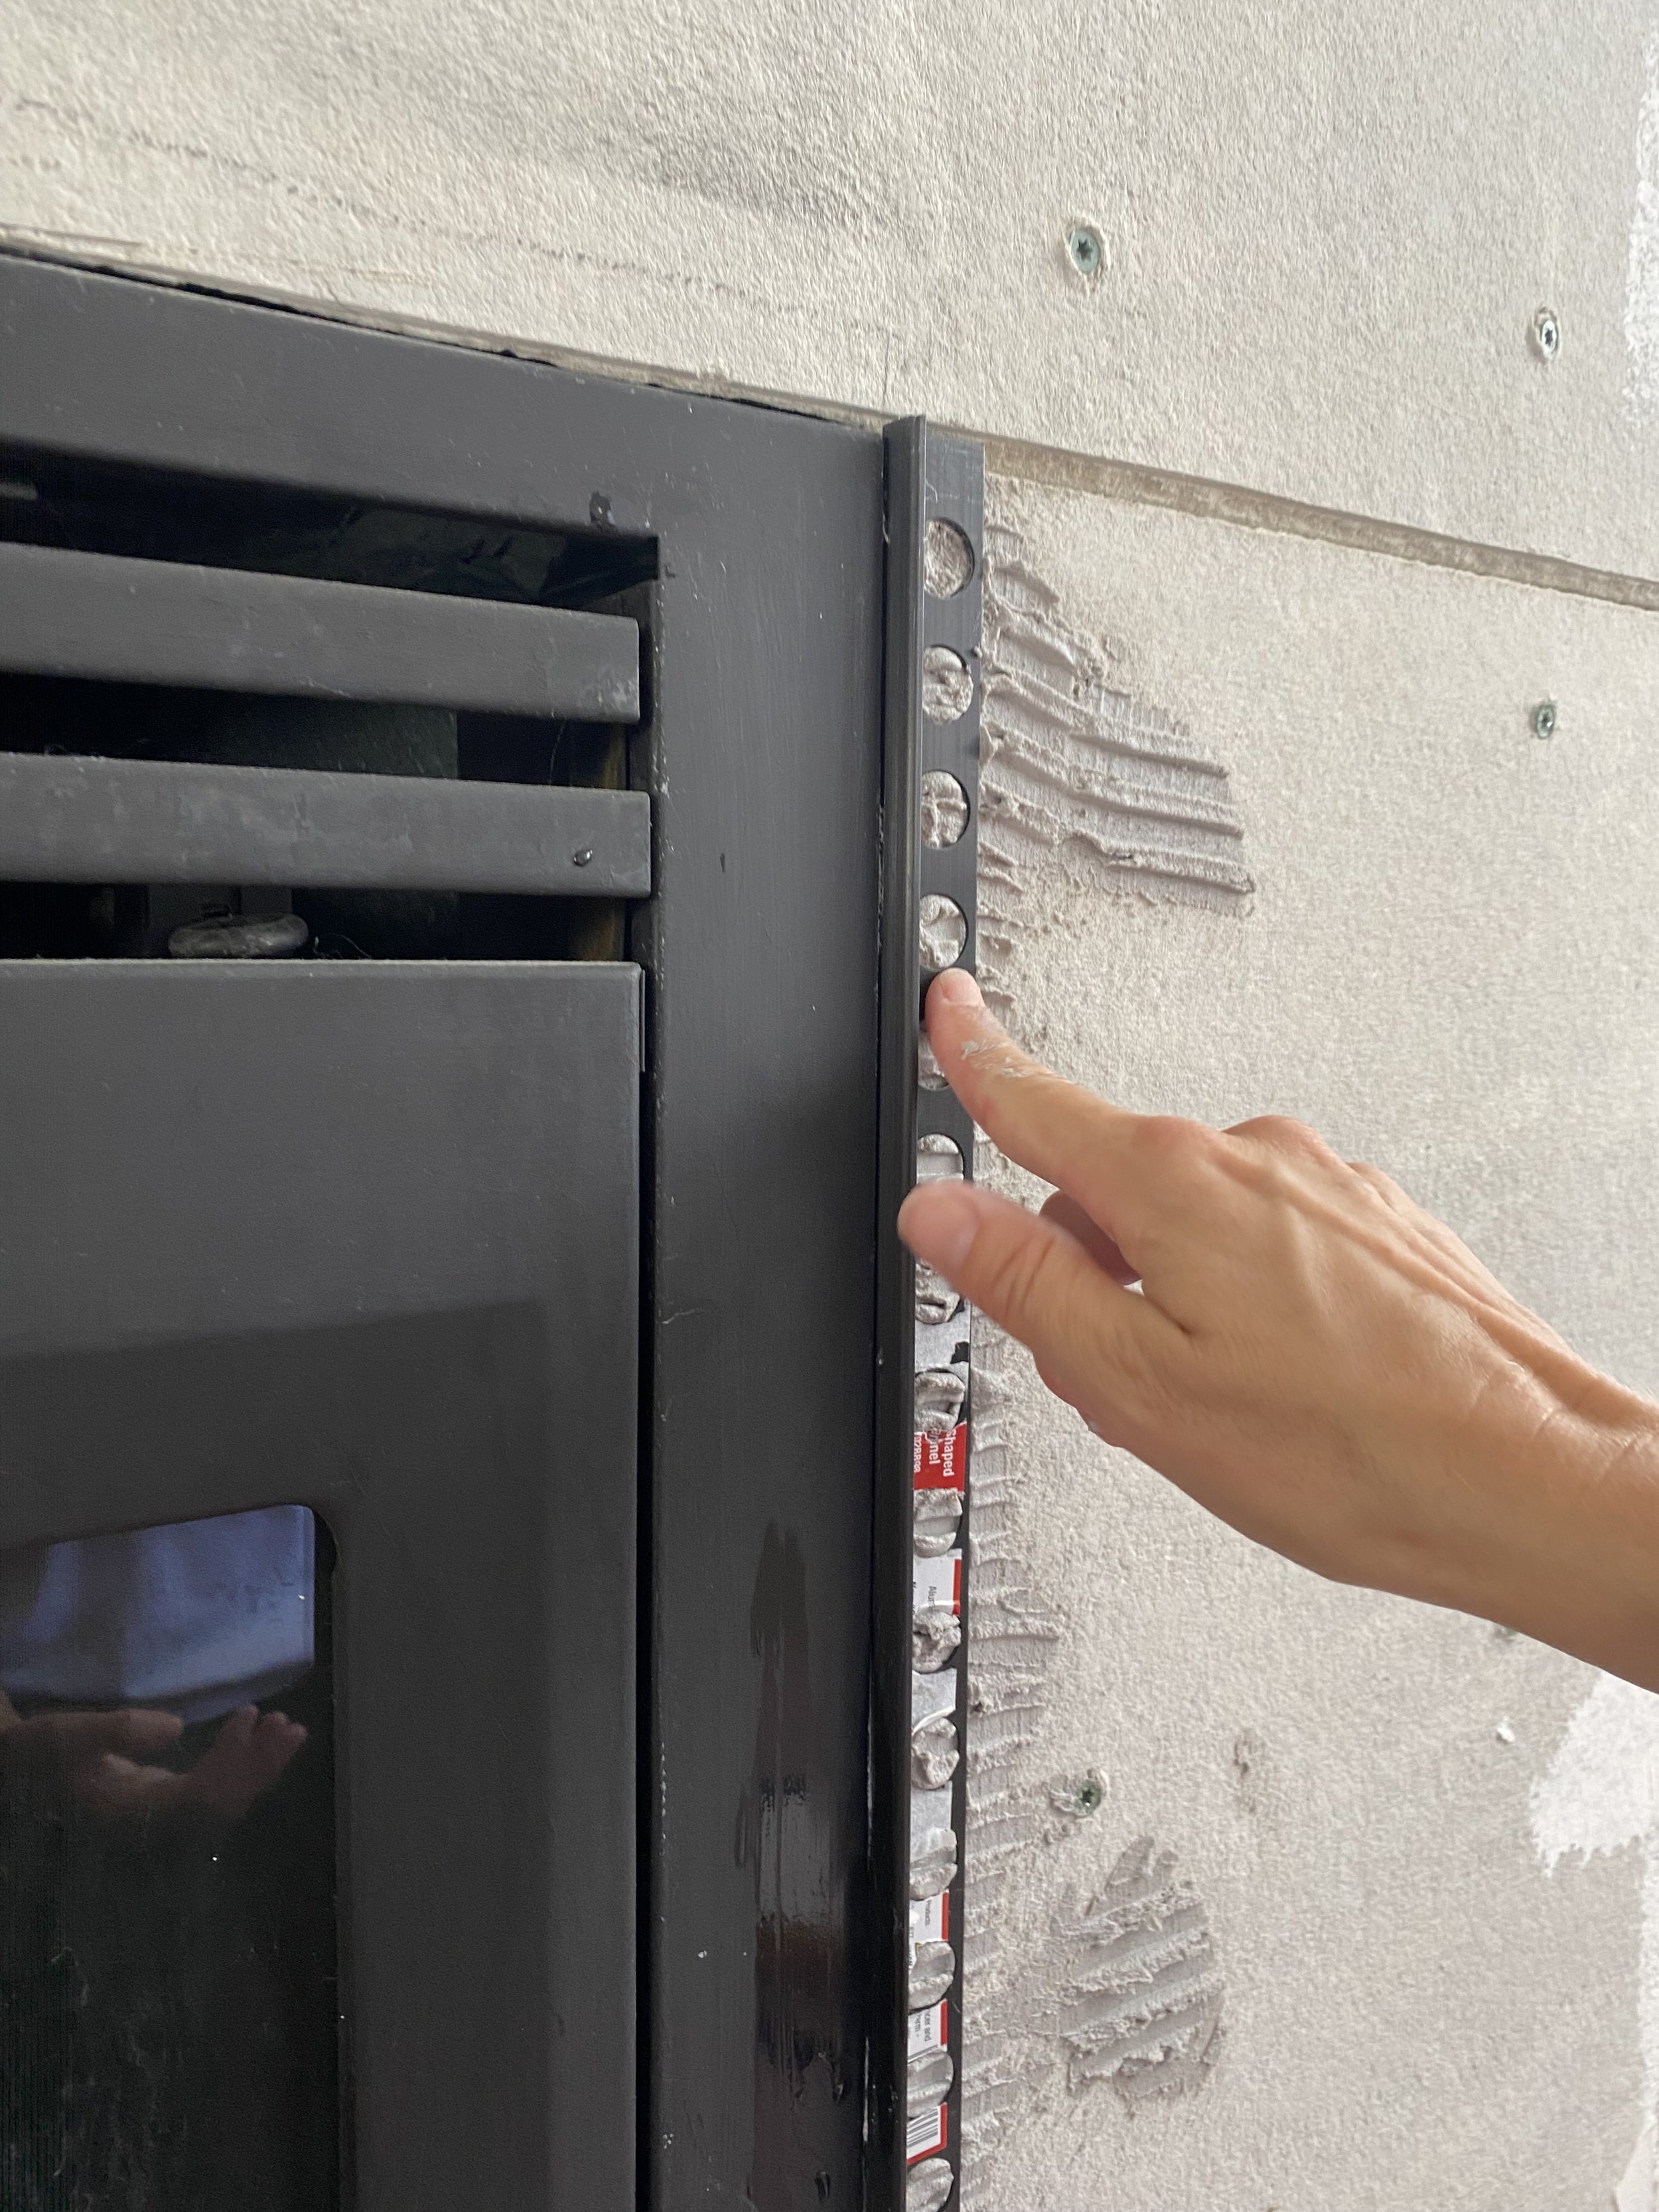
Although we’d never tiled a wall before, Selena and I teamed up to DIY this project. The black zellige tiles I chose were glossy on top, but the natural clay base showed along the perimeter, which we wanted to conceal. We covered the sides using Schluter, metal strips used to protect tile edges and eliminate the need for caulking or edging. This gave a super clean look. But all the color differentiation on top of the tile made it really tough to choose the right grout color. We considered mixing a few, but I’d never be able to match the tone if I needed to touch it up later on, so we chose the darkest grout available. And I’m super glad we did because I love how it turned out!
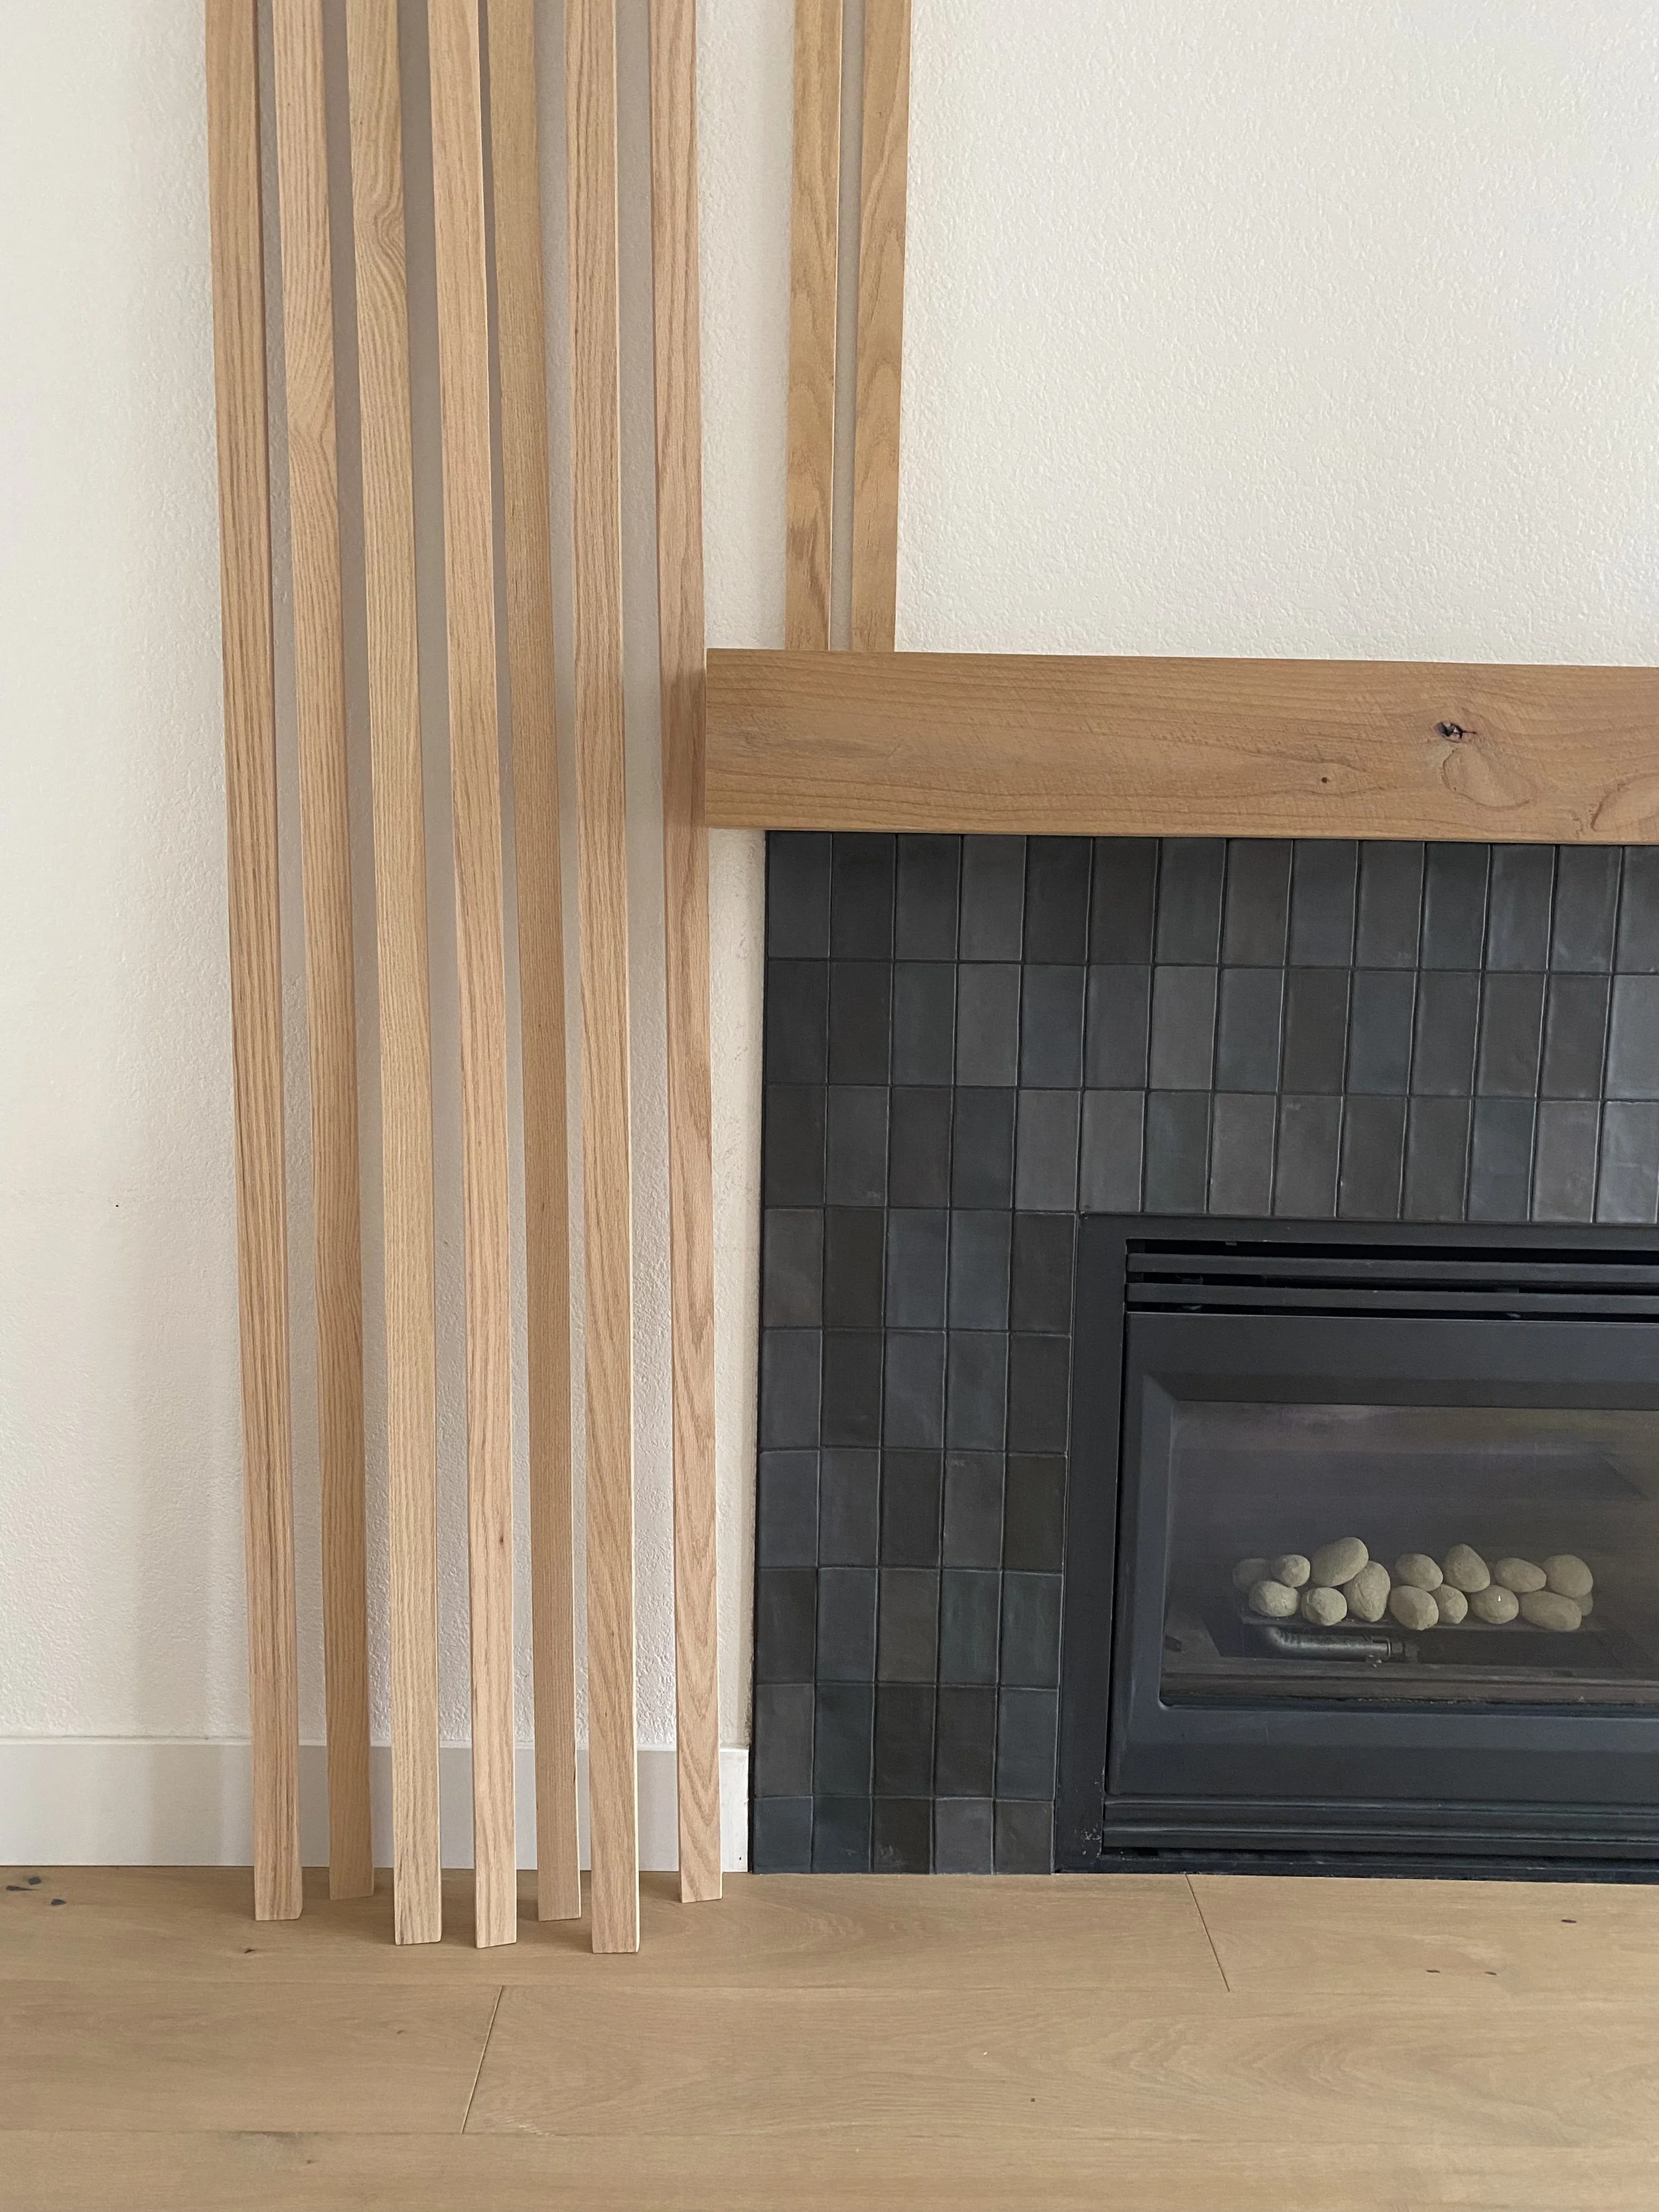
To contrast all the natural texture from the tile, I wanted a sleek, modern white oak mantel with clean, square lines—no fancy details. I found the perfect one on Etsy and had my contractor install it.
Pro tip: Etsy is a fantastic resource for custom, handmade goods. Sometimes the site gets a bad rap because people assume it’s too arts-and-crafty. But there are so many unique finds on Etsy made by real artisans. Plus, it’s a great way to support small businesses!
DIY Wood Slat Fireplace Wall Feature
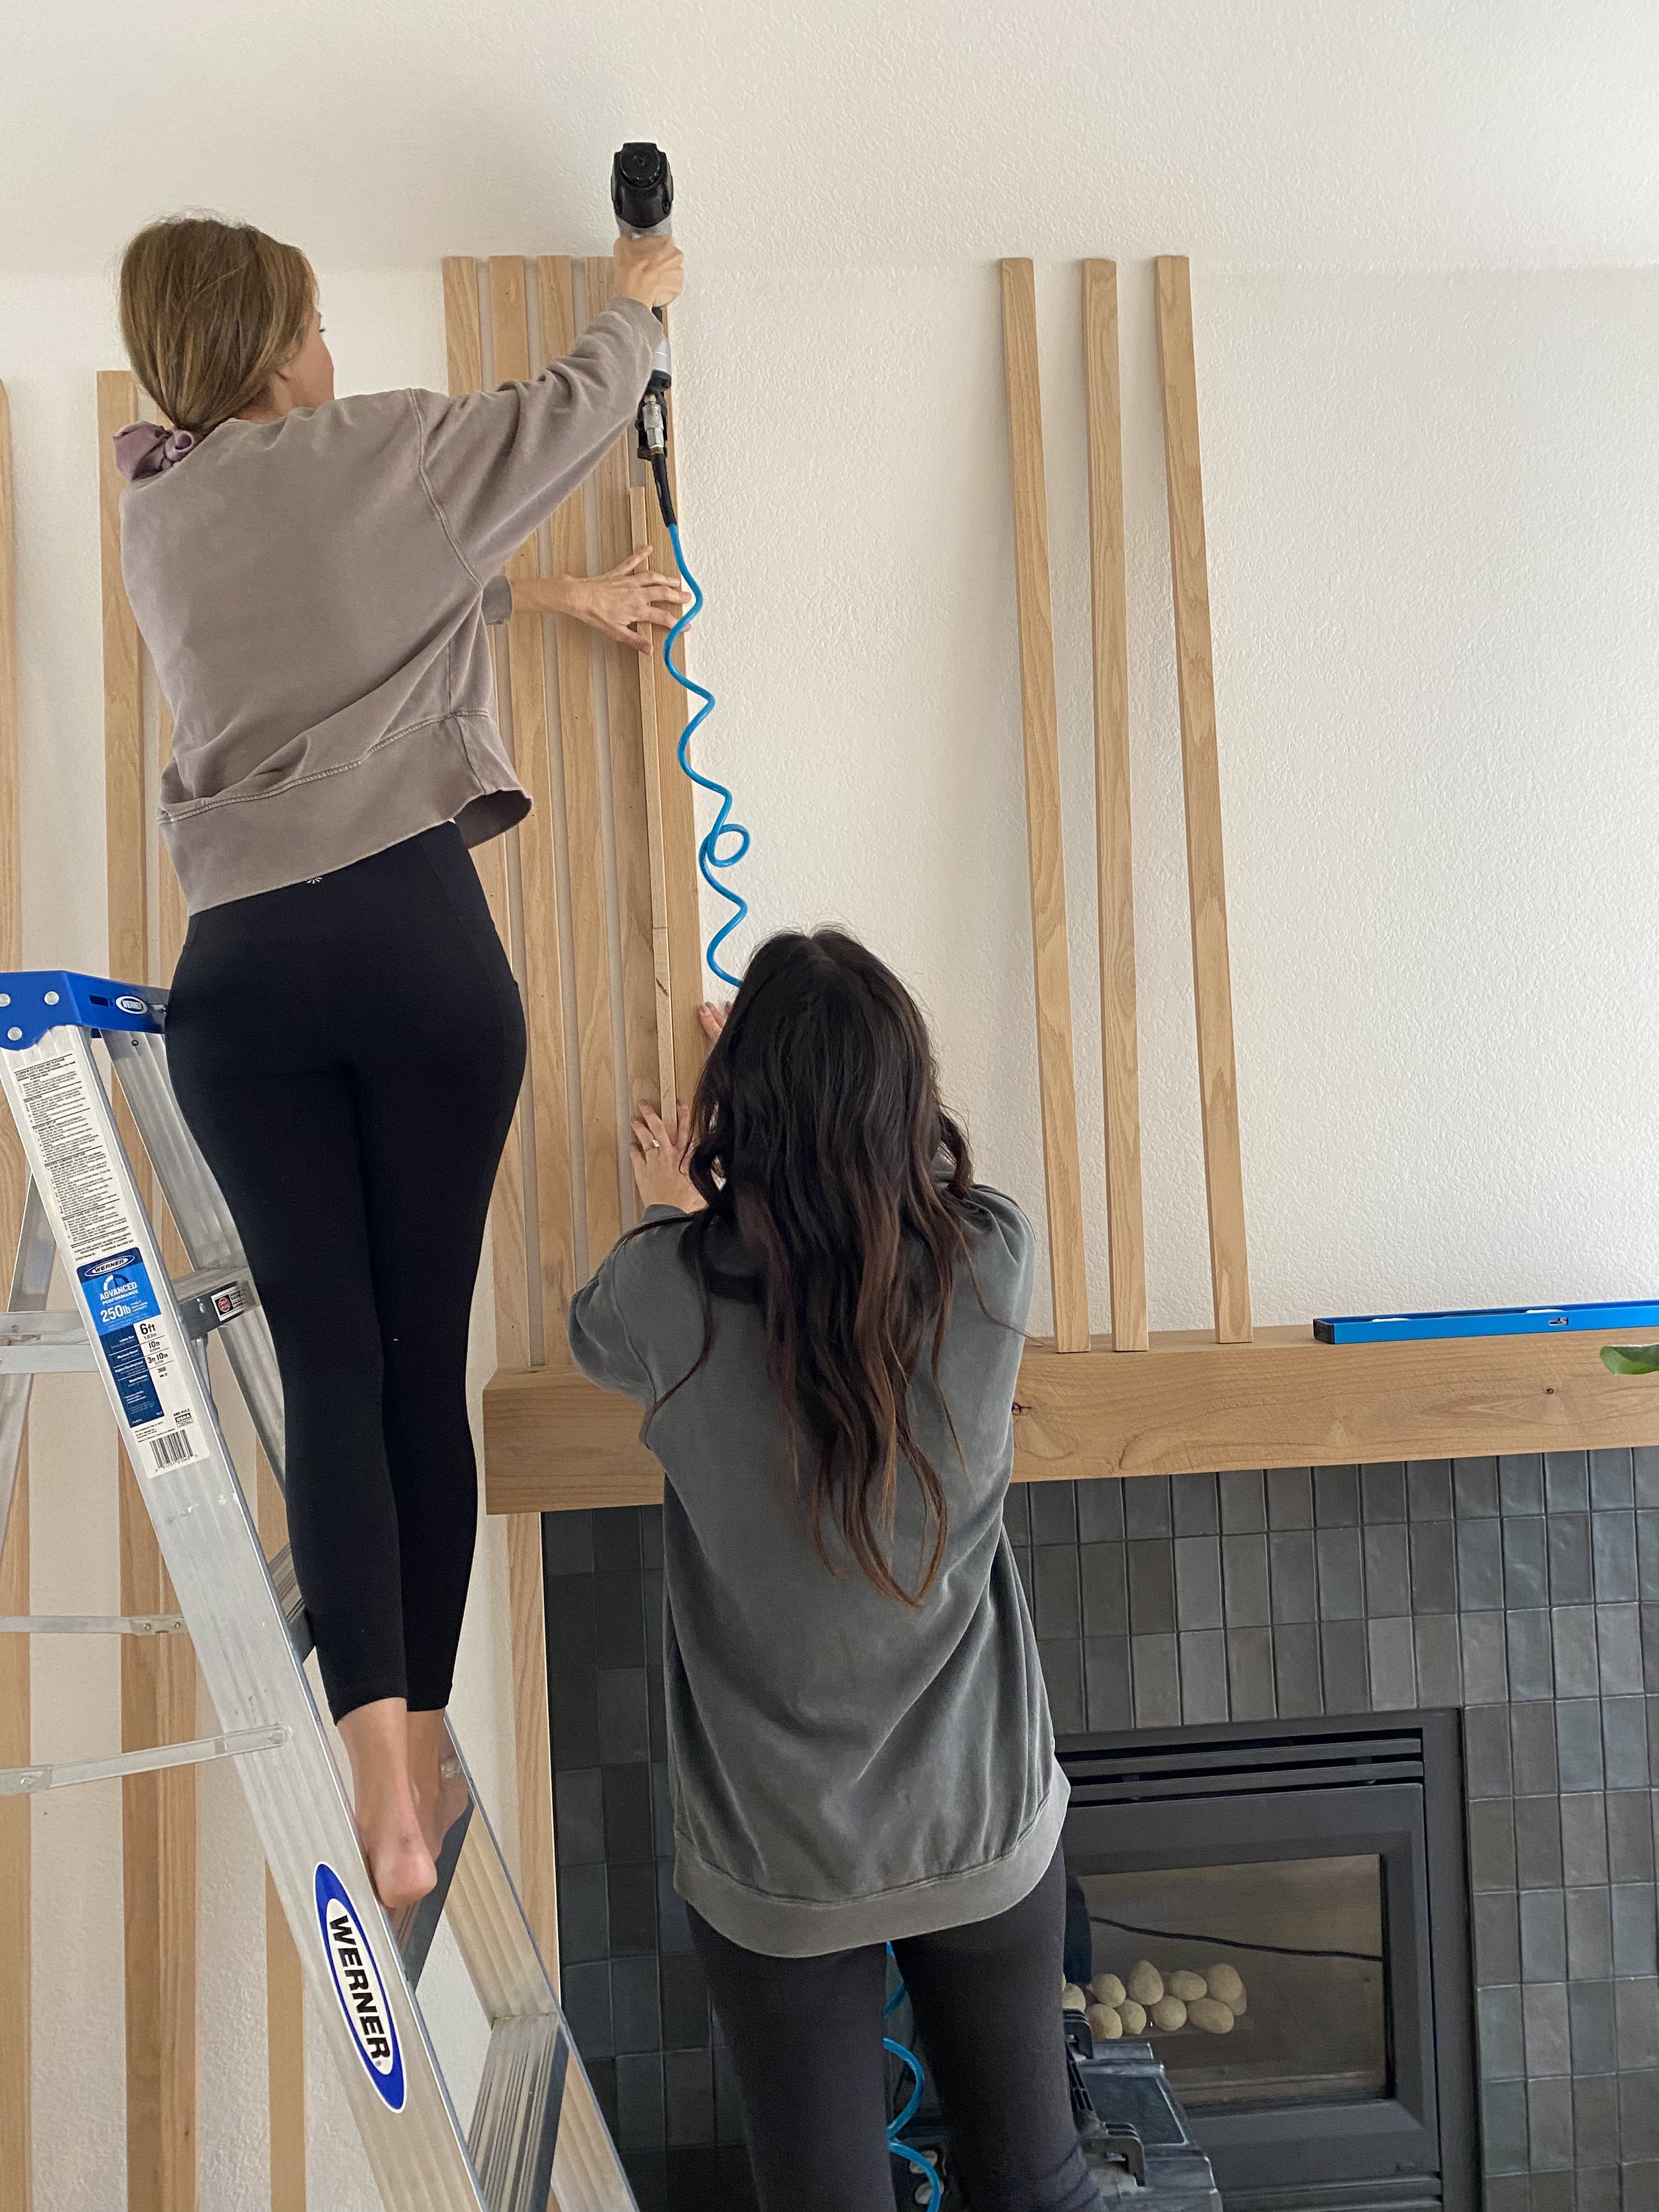
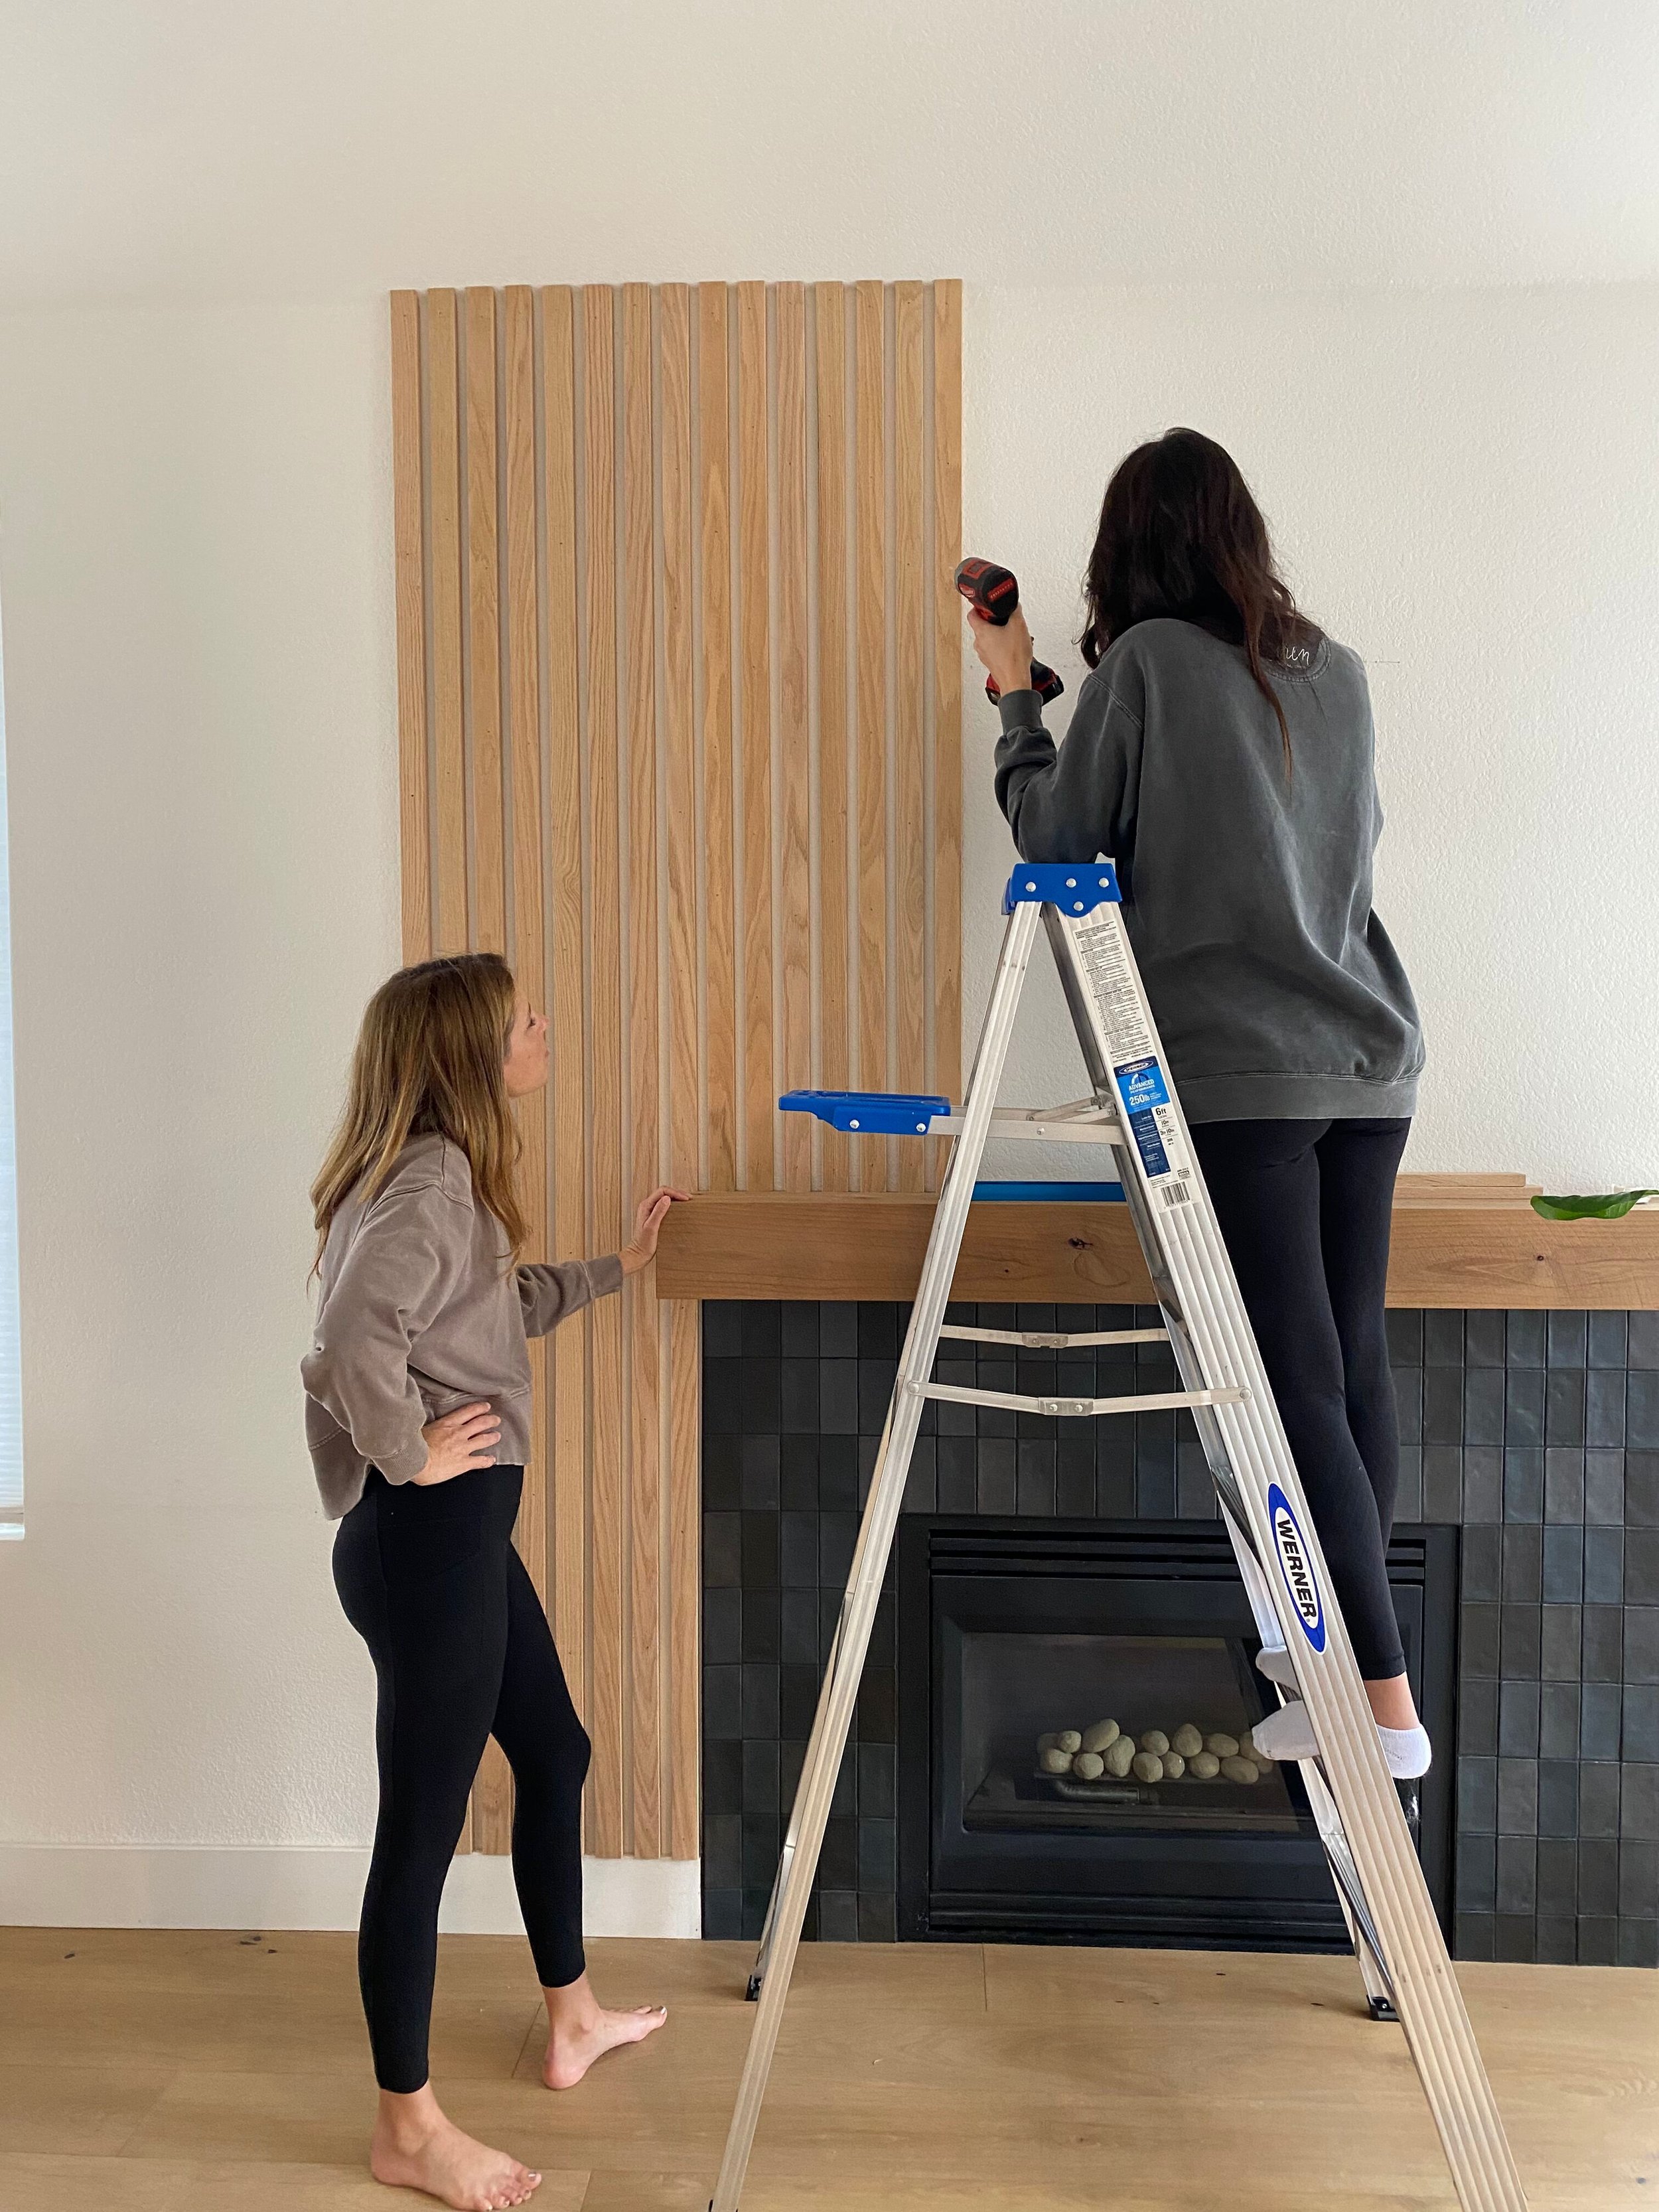
With the pretty new tile and mantel in place, it was time to address the wall behind the fireplace. As I mentioned, the setup here was a little awkward, as the fireplace is offset between two windows. Additionally, the insert itself felt really small compared to the expansive wall behind it.
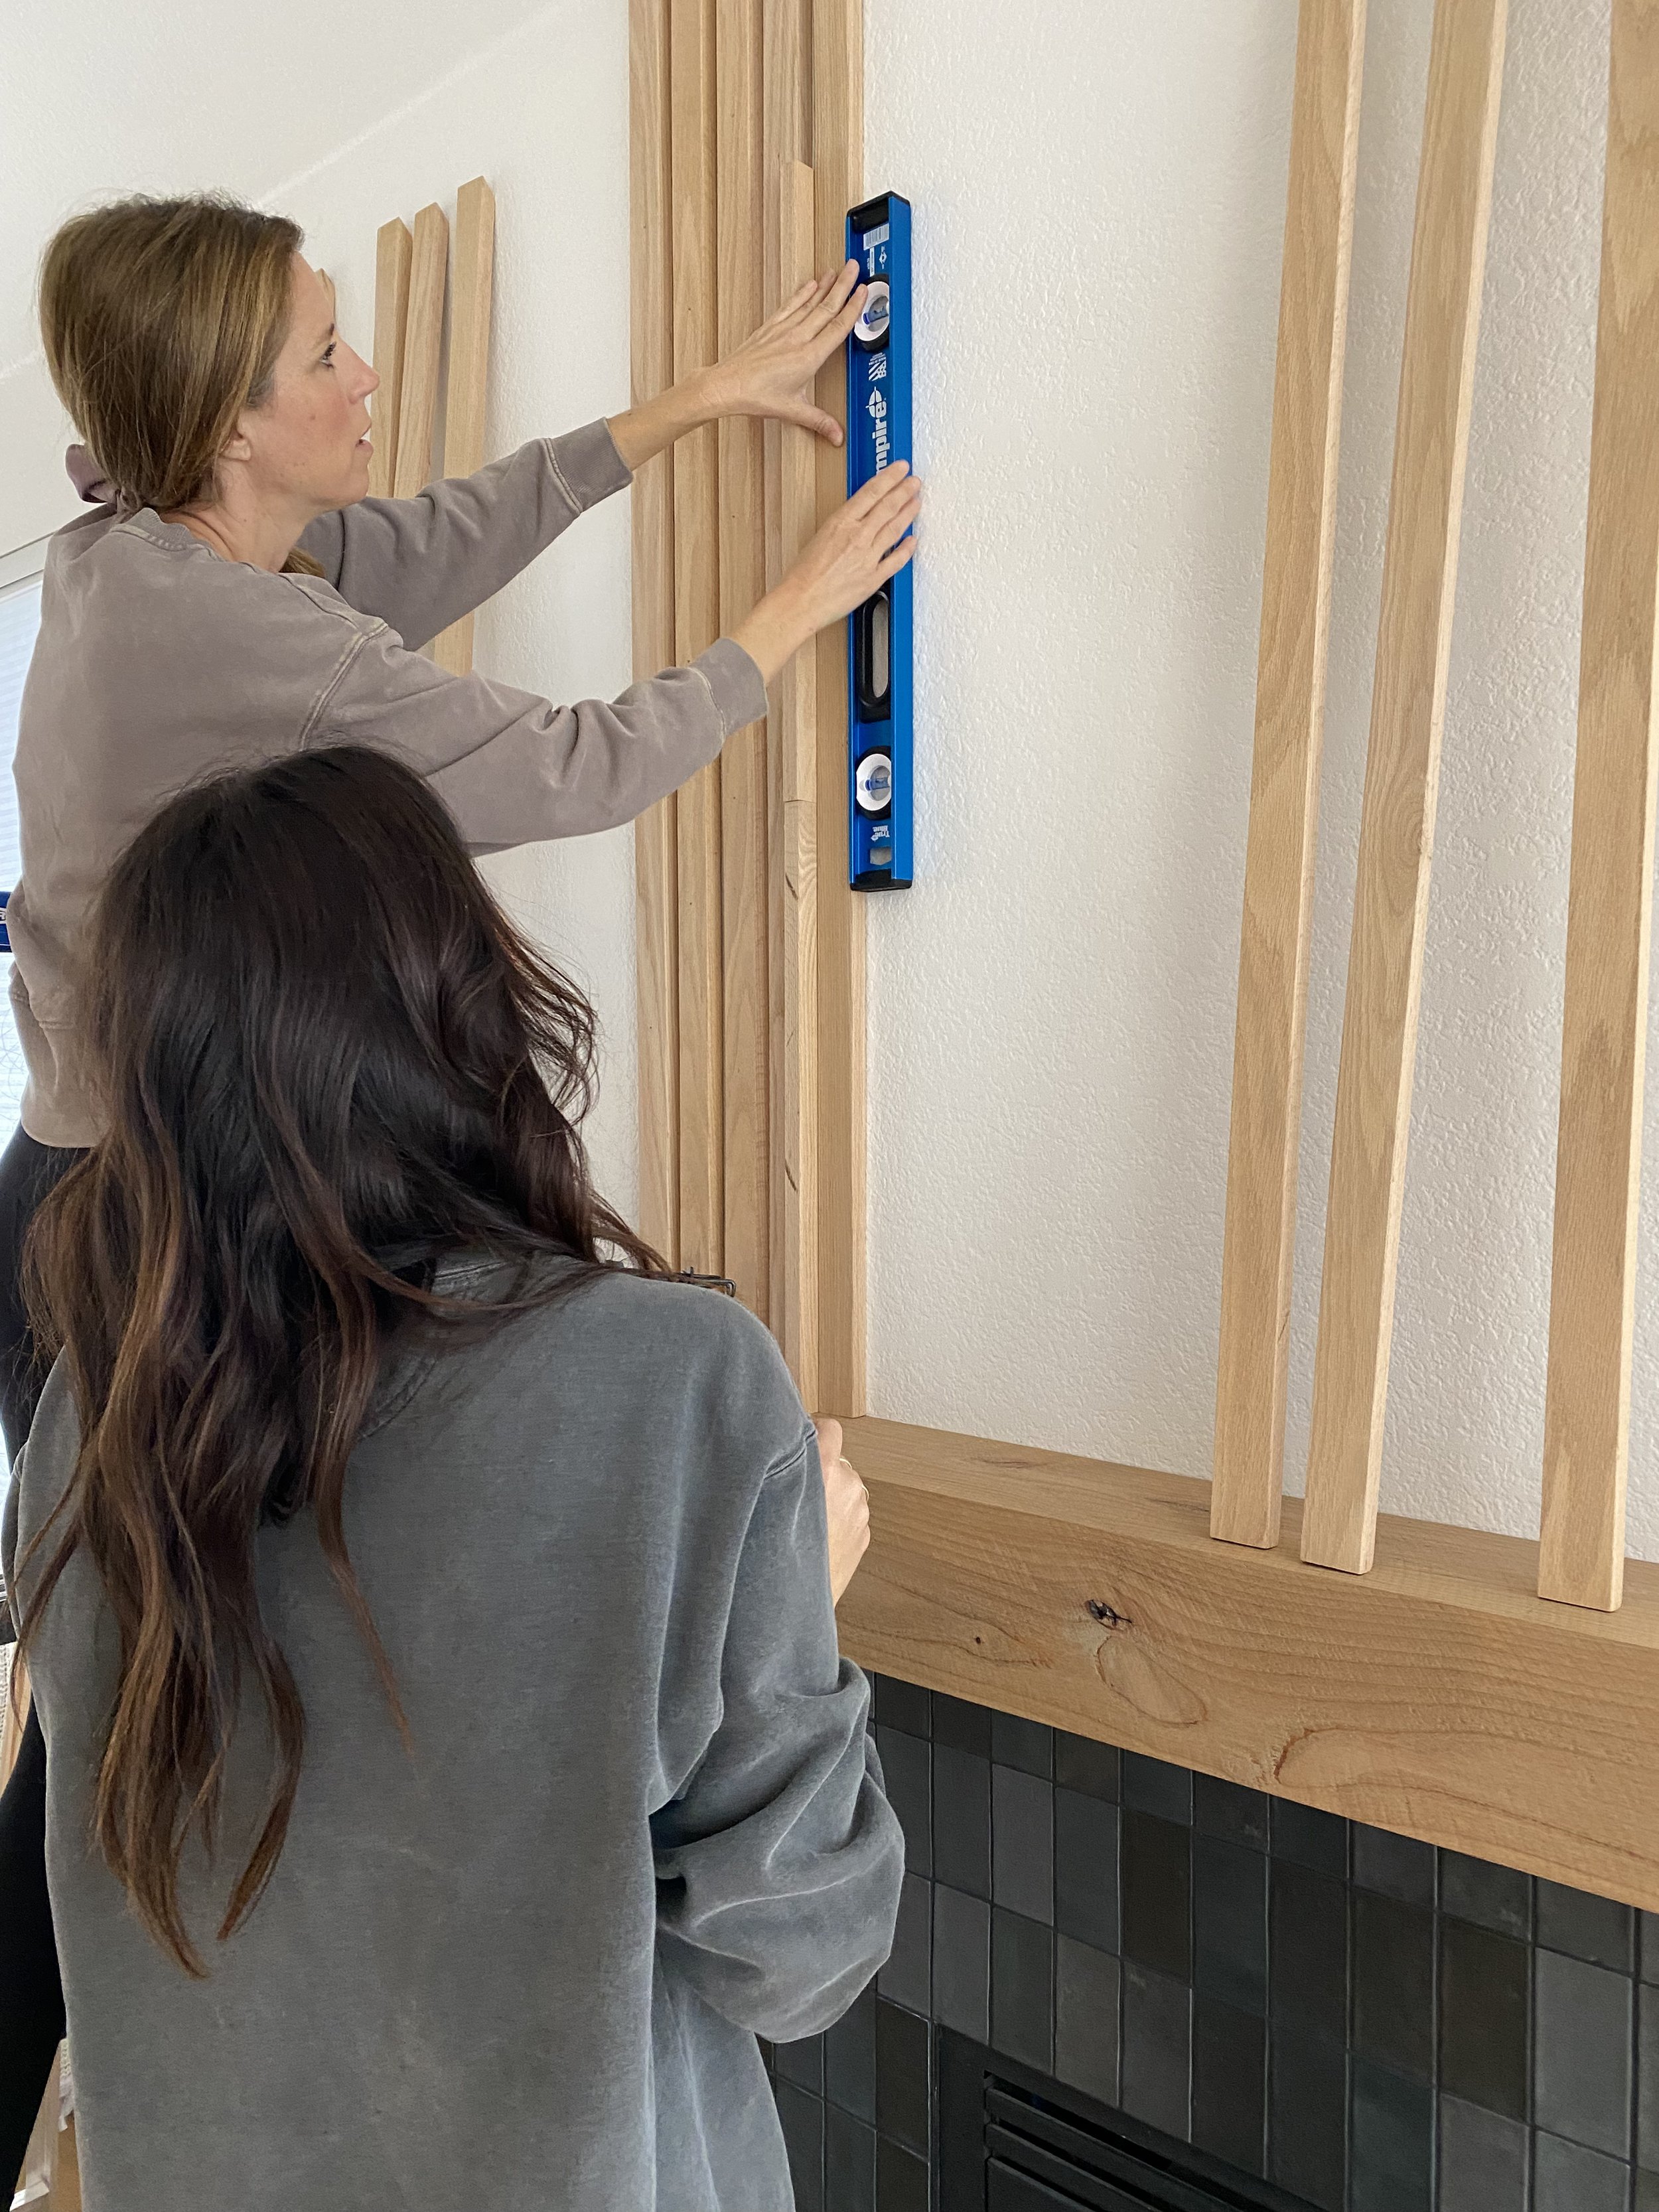
After working through a few iterations, Selena and I accepted that we’d never be able to make it look perfectly symmetrical. Instead, we’d be better off accentuating its uniqueness by creating a purposefully asymmetrical wall feature. Doing so would also help expand the fireplace, giving the impression that it’s larger than it is.
Using wood that we cut down to narrow planks, about 1.5 inches wide, we DIYd a complete wood slat feature. We used the same wood tone as the mantle and overlapped the slats about 12 inches with the fireplace so it blended in seamlessly.
I kept the original gas insert but covered the inside with black heatproof paint to restore the interior and give it a new life. Then to finish the look, I replaced the original fake fireplace logs with concrete spheres. They mimic river rocks and beautifully offset the clean edges of the tiles.
If you also adore light, bright spaces, you may not have considered using dark tile either. But this black zellige tile paired with the wood slat wall feature adds just enough interest to make the space pop. If you've tried a similar asymmetrical look, tag us on Instagram and show it off!