Create a Grateful Gallery Wall For Thanksgiving
Hey guys, Selena here with a DIY that’s perfect for Thanksgiving!
Recently, I was struck by an adorable little detail on a visit to a friend’s house. She had hung 2 small photos of her kids over her kitchen sink, allowing her to look up and see a few loving faces staring back at her while she scrubs the dishes.
Truth be told, I had never hung family photos in my house until this project. I didn’t even put up photos from my wedding! Don’t get me wrong, I love seeing pictures of my kids, and they like looking at pictures of themselves, too. I just never thought to put them on display. As we quickly approach Thanksgiving, I was inspired to create a “Grateful Gallery” where I could showcase all the pictures I cherish.
This would also work perfectly with photos of anything you are grateful for or that brings your joy - maybe it’s pets, your travels, or even inspiring words or images - and it’s an easy way to extend that feeling of gratitude we all cultivate during the holidays all year long.
Here’s how I DIYd a picture ledge gallery wall in my house (and a few alternatives for those of you who want to get the look without all the work)!
Option 1: DIY Picture Ledge Gallery Wall
One of my favorite ways to display groups of photos is to stand them on a floating shelf. For my home, I wanted a really clean look without any hardware showing. But unfortunately, brackets are typically visible on most picture ledges and floating shelves on the market. So with some support from my handy stepdad, we took on this project together. Here’s how we made it work:
Step 1:
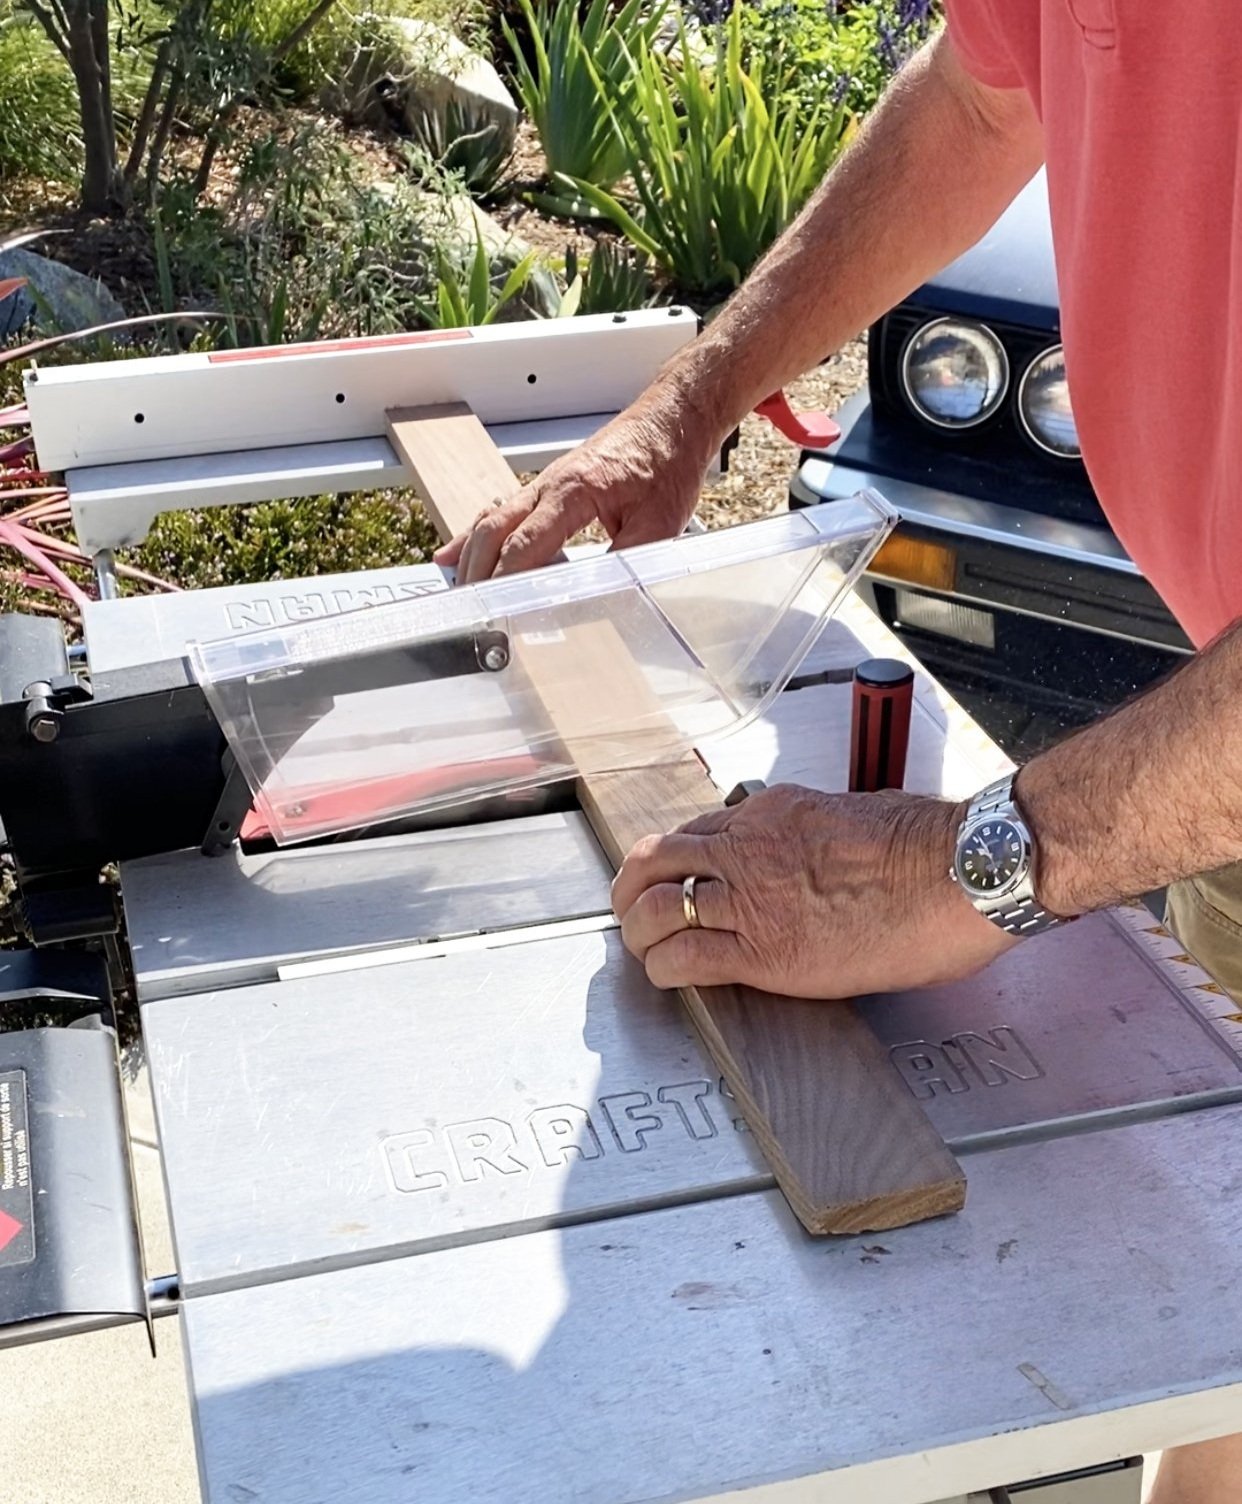
First, I picked up some pretty walnut plywood lumber at Home Depot in two different thicknesses: extra thick for the bottom shelf and thin for the ledge. Once I brought them home, my step dad and I cut all the pieces to our desired length.
Step 2:
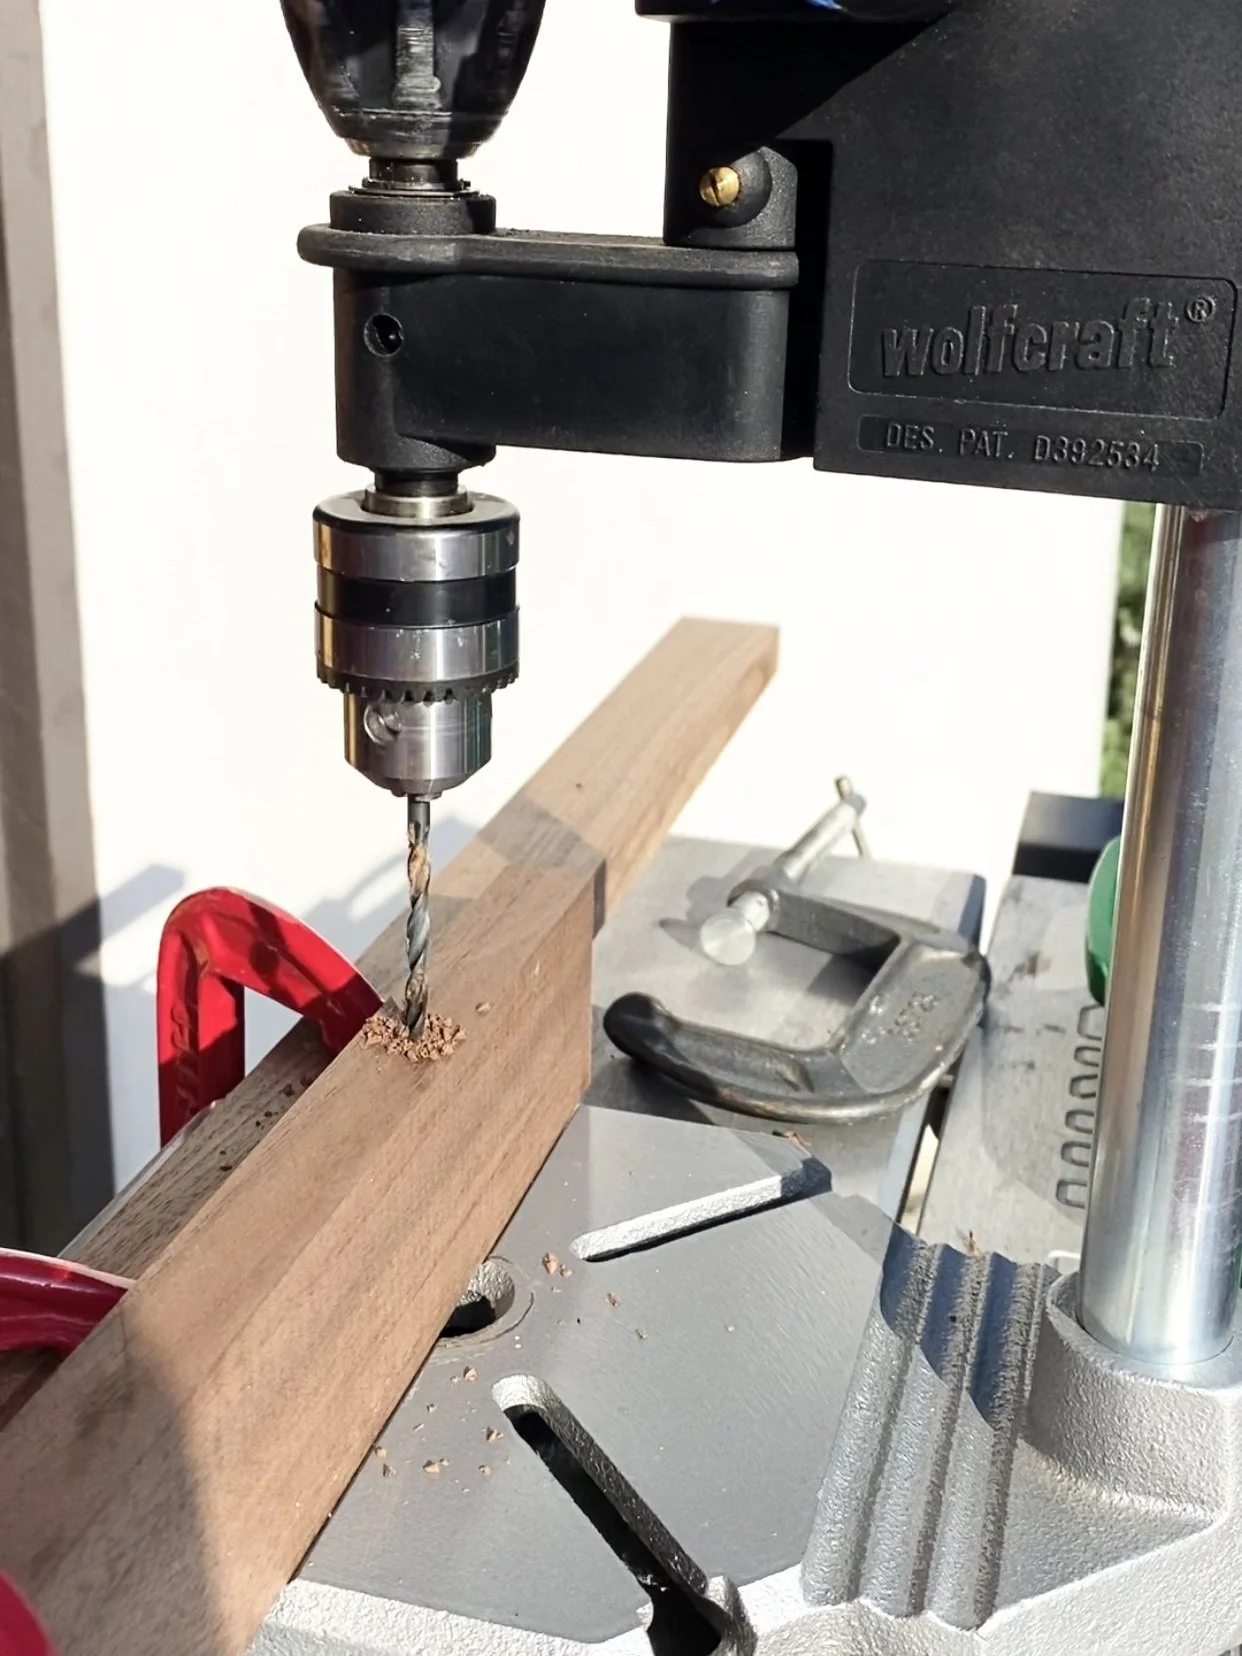
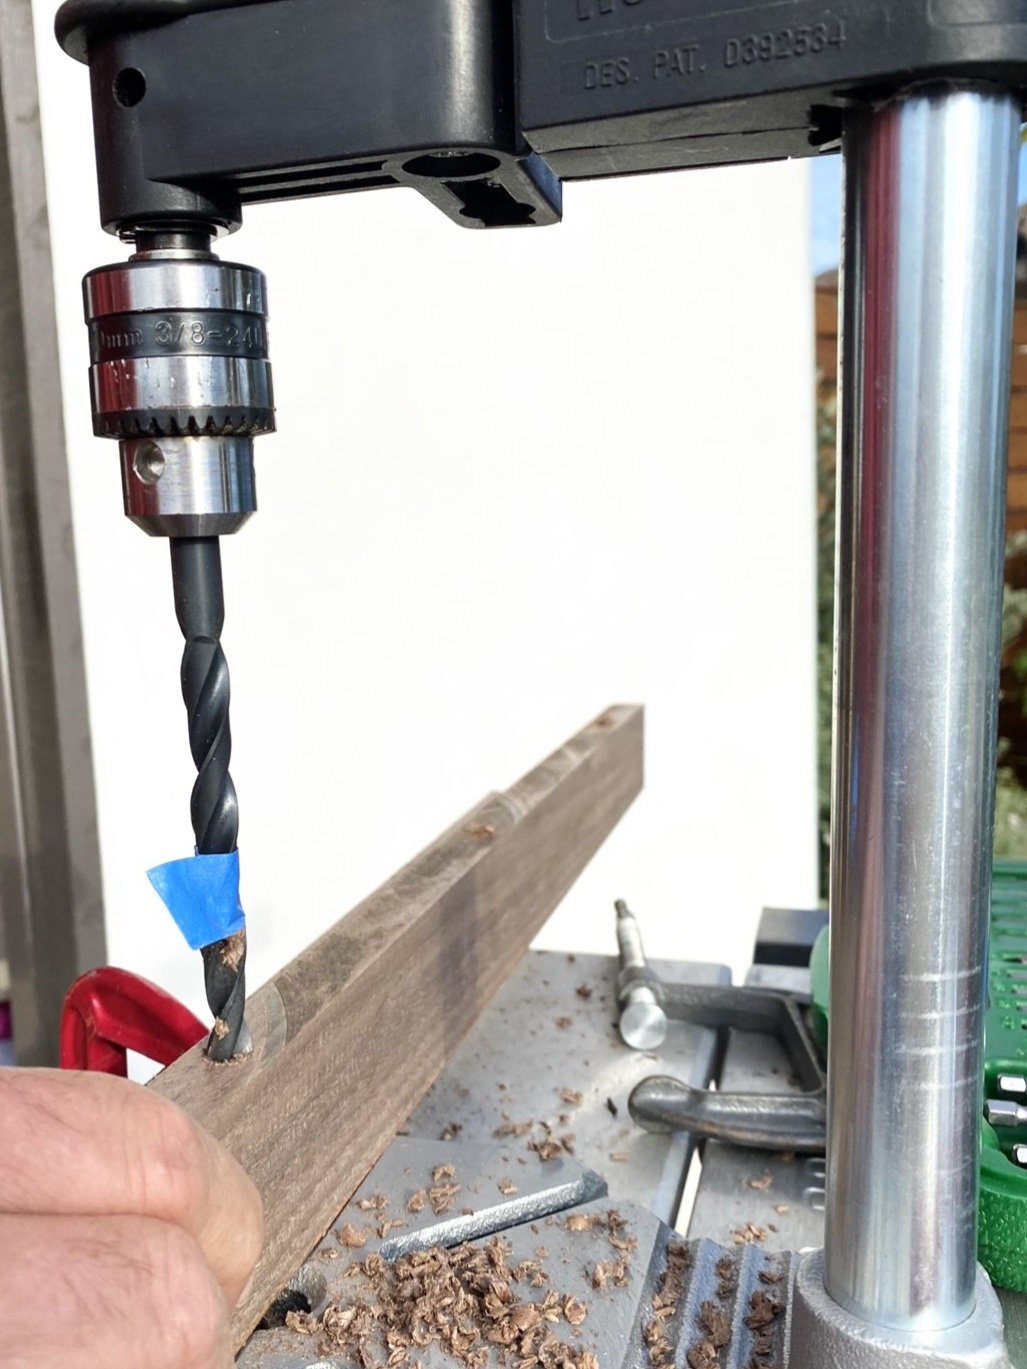
The best way to get a bracket-free floating shelf is to countersink your screws, a method of drilling that drives screws below the wood surface so that they rest flush with the wood. To do this, first pre-drill holes for the screws. Then, use a second larger drill bit to make wider holes in the front half of the wood, allowing the screw heads to sit below the surface. Use a drill press if you have one to make this step quick and efficient.
PRO TIP: When you are drilling the second larger hole, you don’t want to go all the way through the wood, so mark your desired depth on the drill bit so you know when you’ve gone far enough.
Step 3:
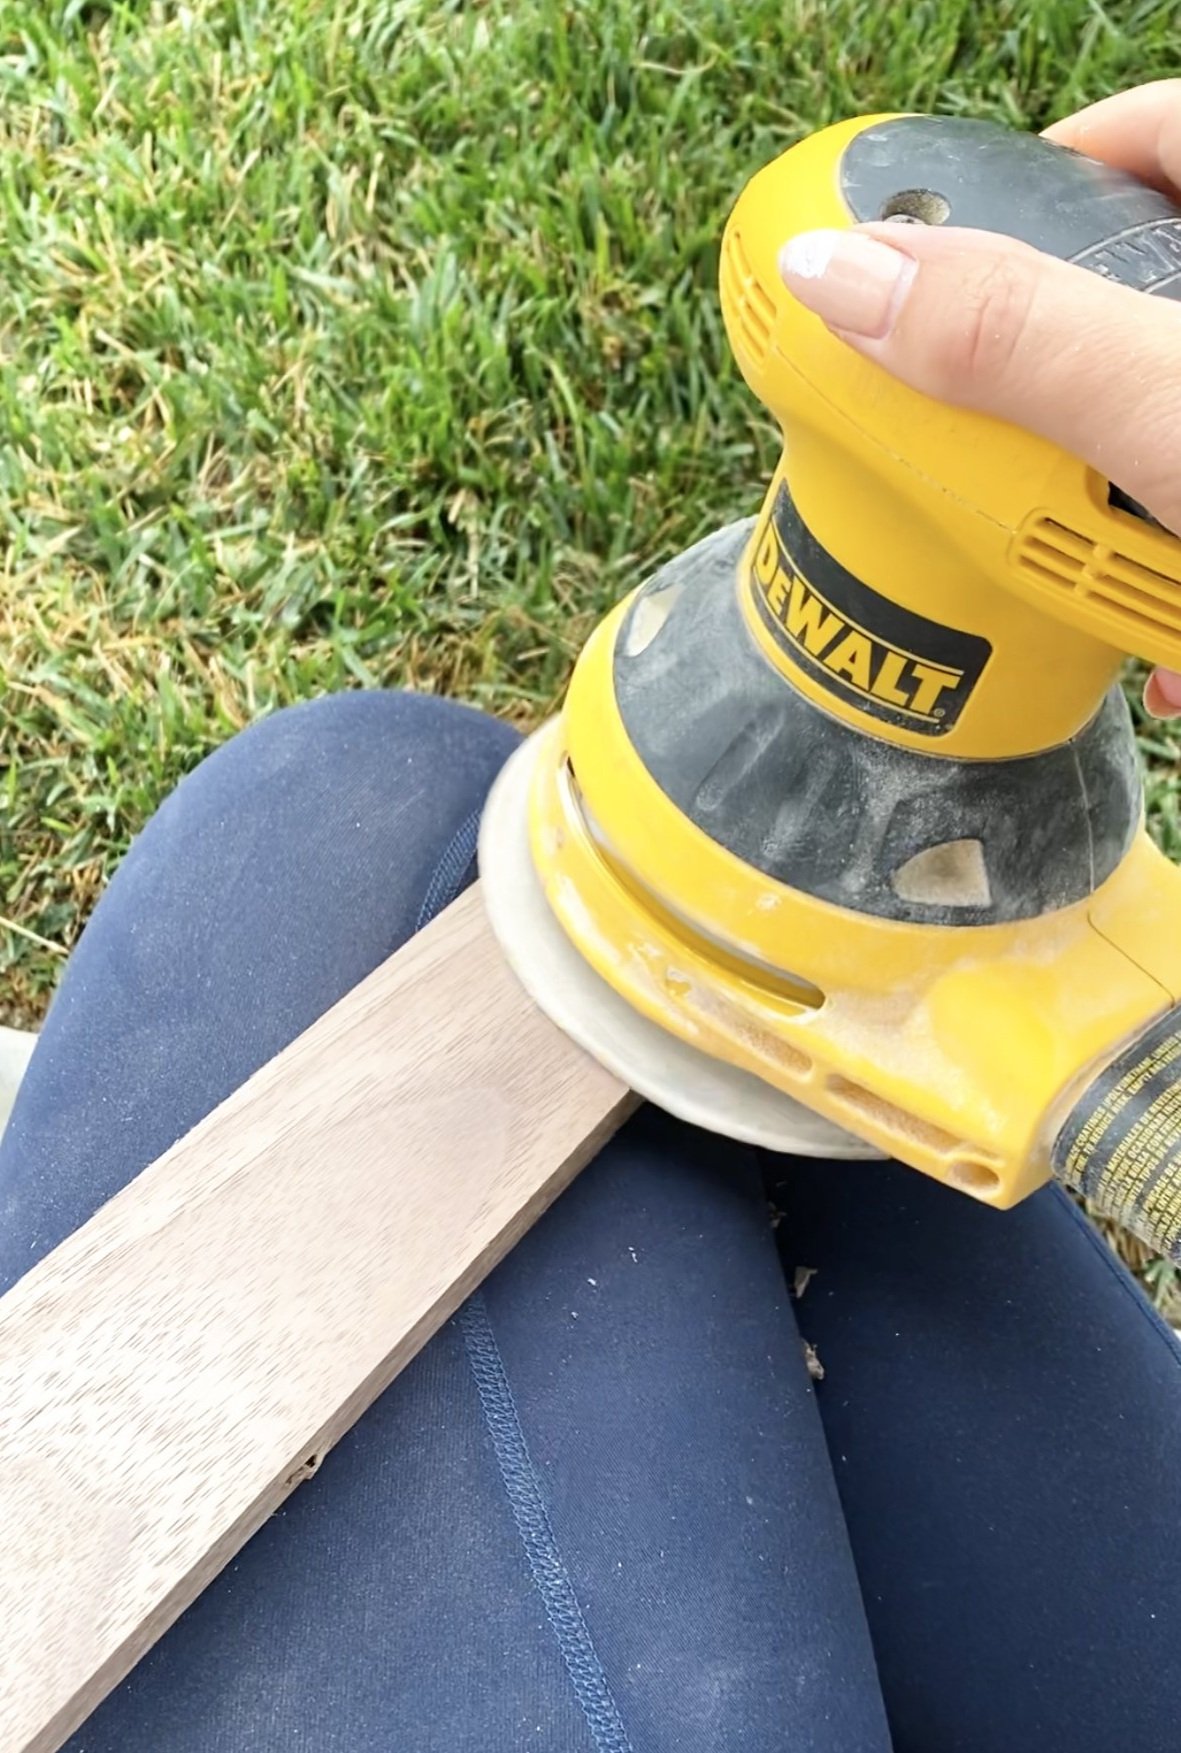
Next, we sanded the wood planks until our arms got sore. It’s especially important to sand the ends to get a clean-cut look!
Step 4:
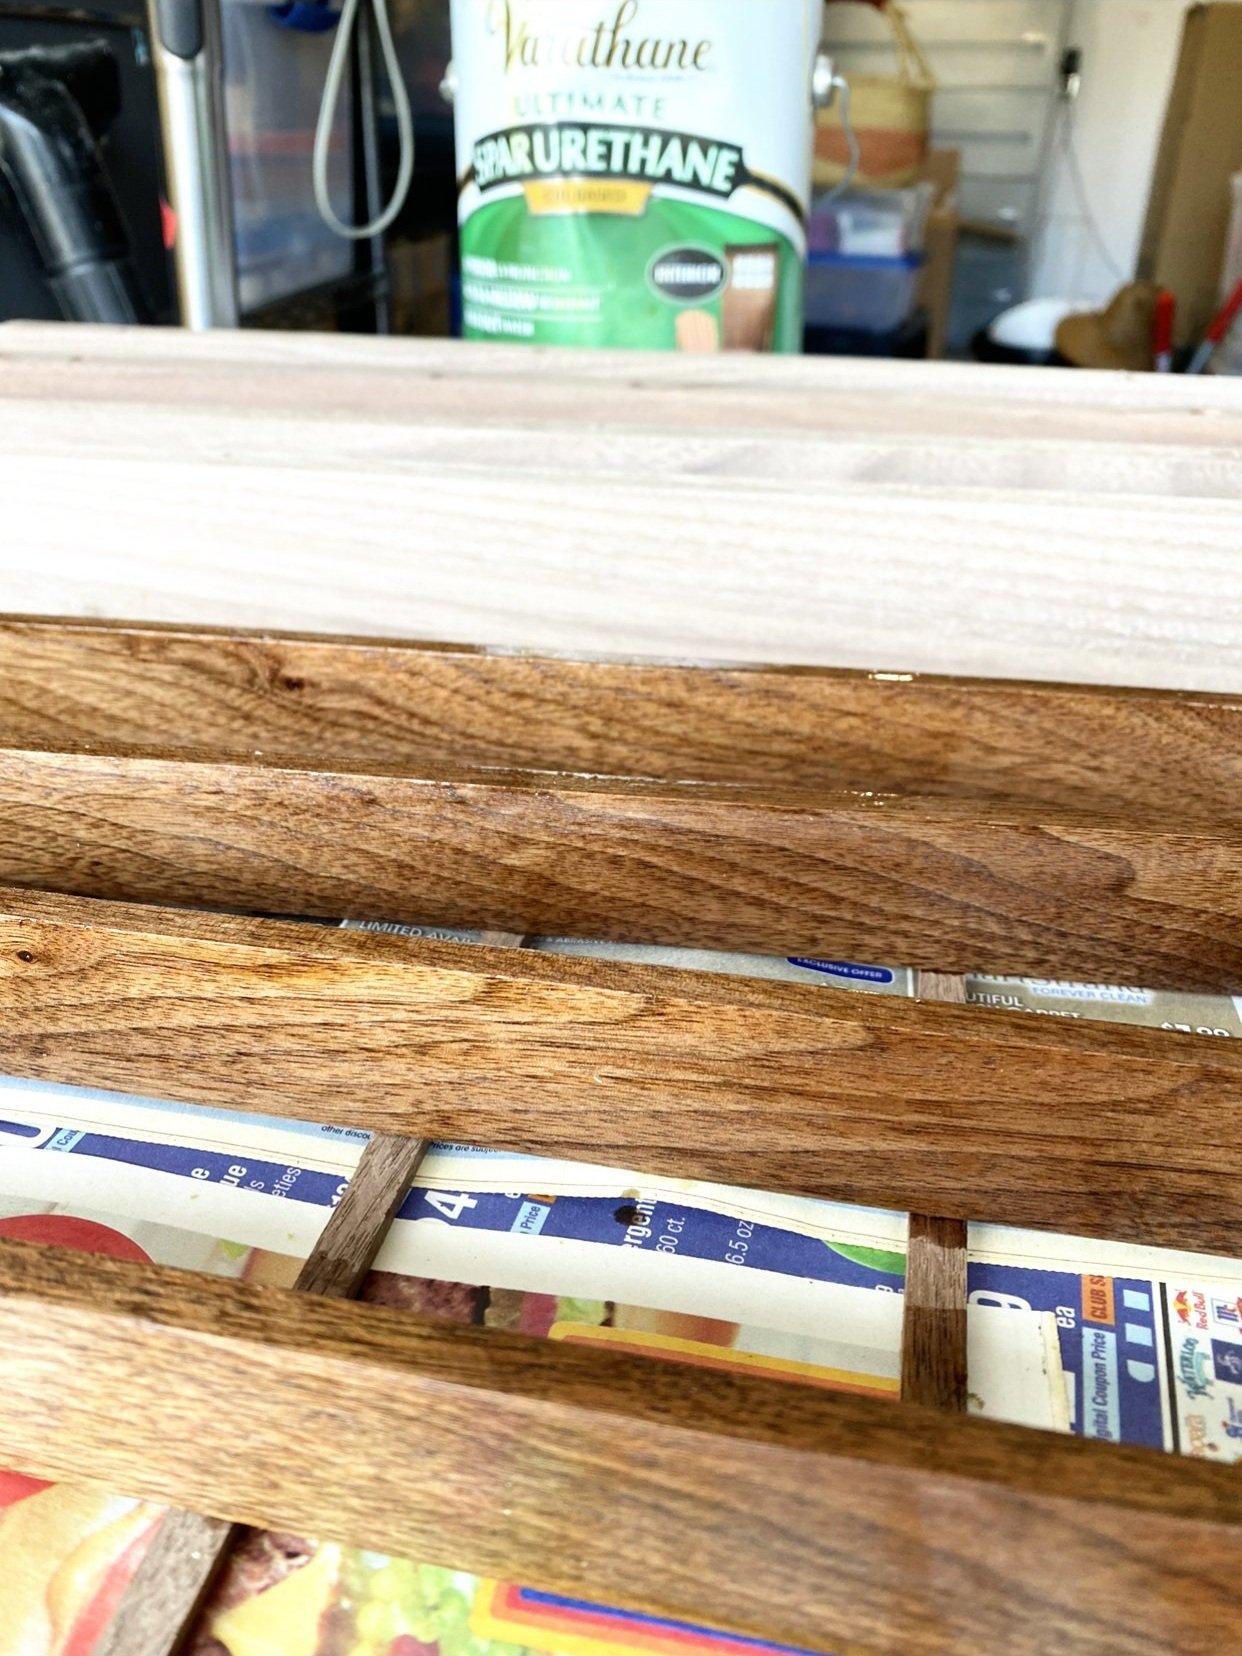
With perfectly smooth wood pieces, we stained all sides with polyurethane to bring the walnut plywood to life.

Step 5:

Before hanging the picture ledges, we first measured their placement on the wall and marked where we wanted them to go using painter’s tape.
Step 6:
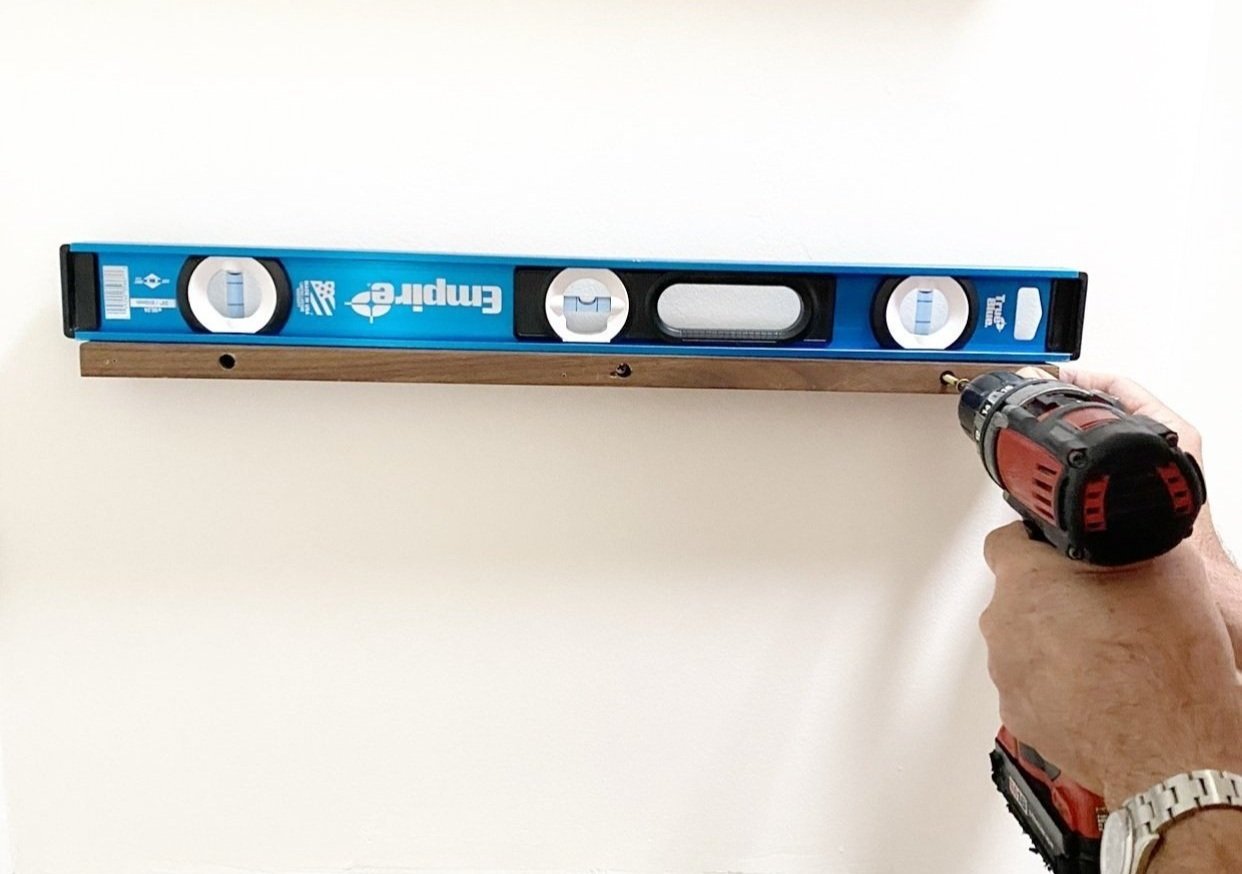
Hanging the shelves was a breeze. Simply hold the planks on the wall, level the shelves so they’re perfectly parallel, then screw them into the studs (which we had measured ahead of time so we knew the holes that we had drilled were in the right place).
Step 7:
Once the shelves are in place, glue the ledges to the front of the shelves and nail them in place. You could do this by hand, but I suggest you simplify the process with a nail gun.
I could have stopped here, but because I didn’t want any hardware showing, I filled all the tiny nail holes with a finishing wax that matched the wood tone for a clean, streamlined look.
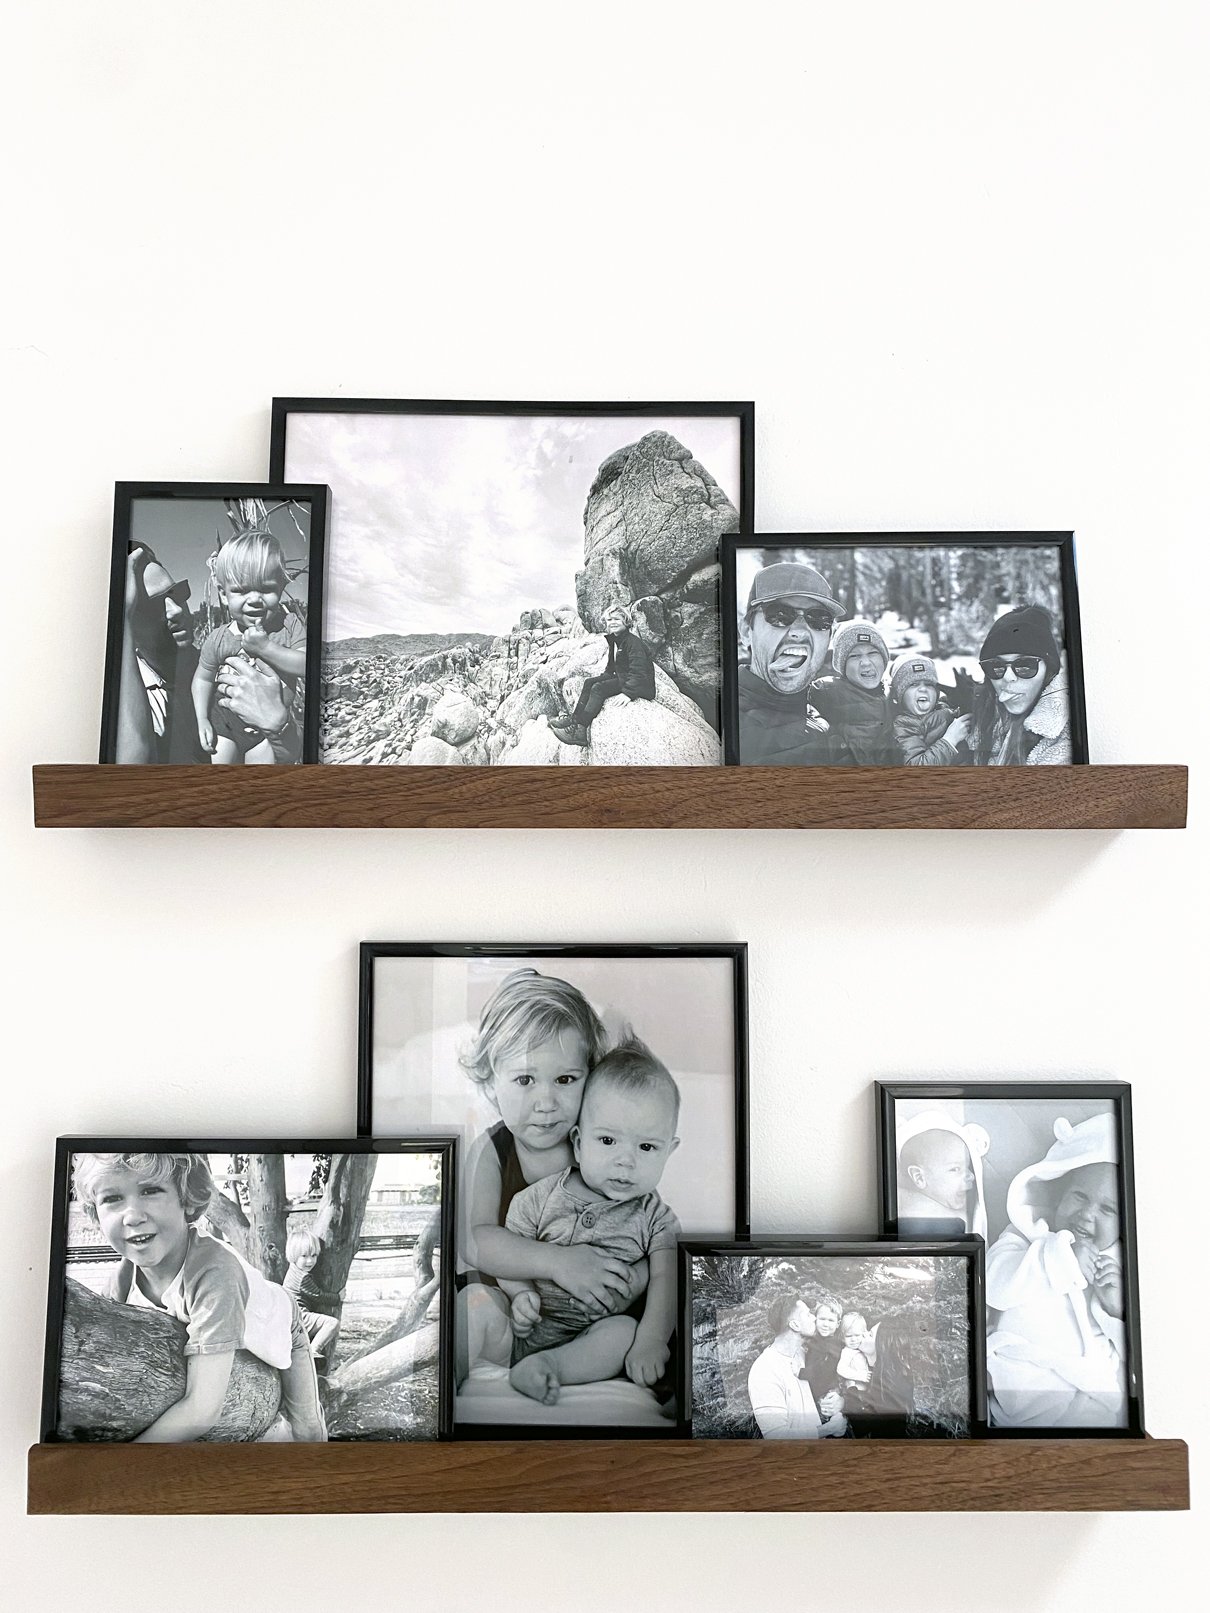
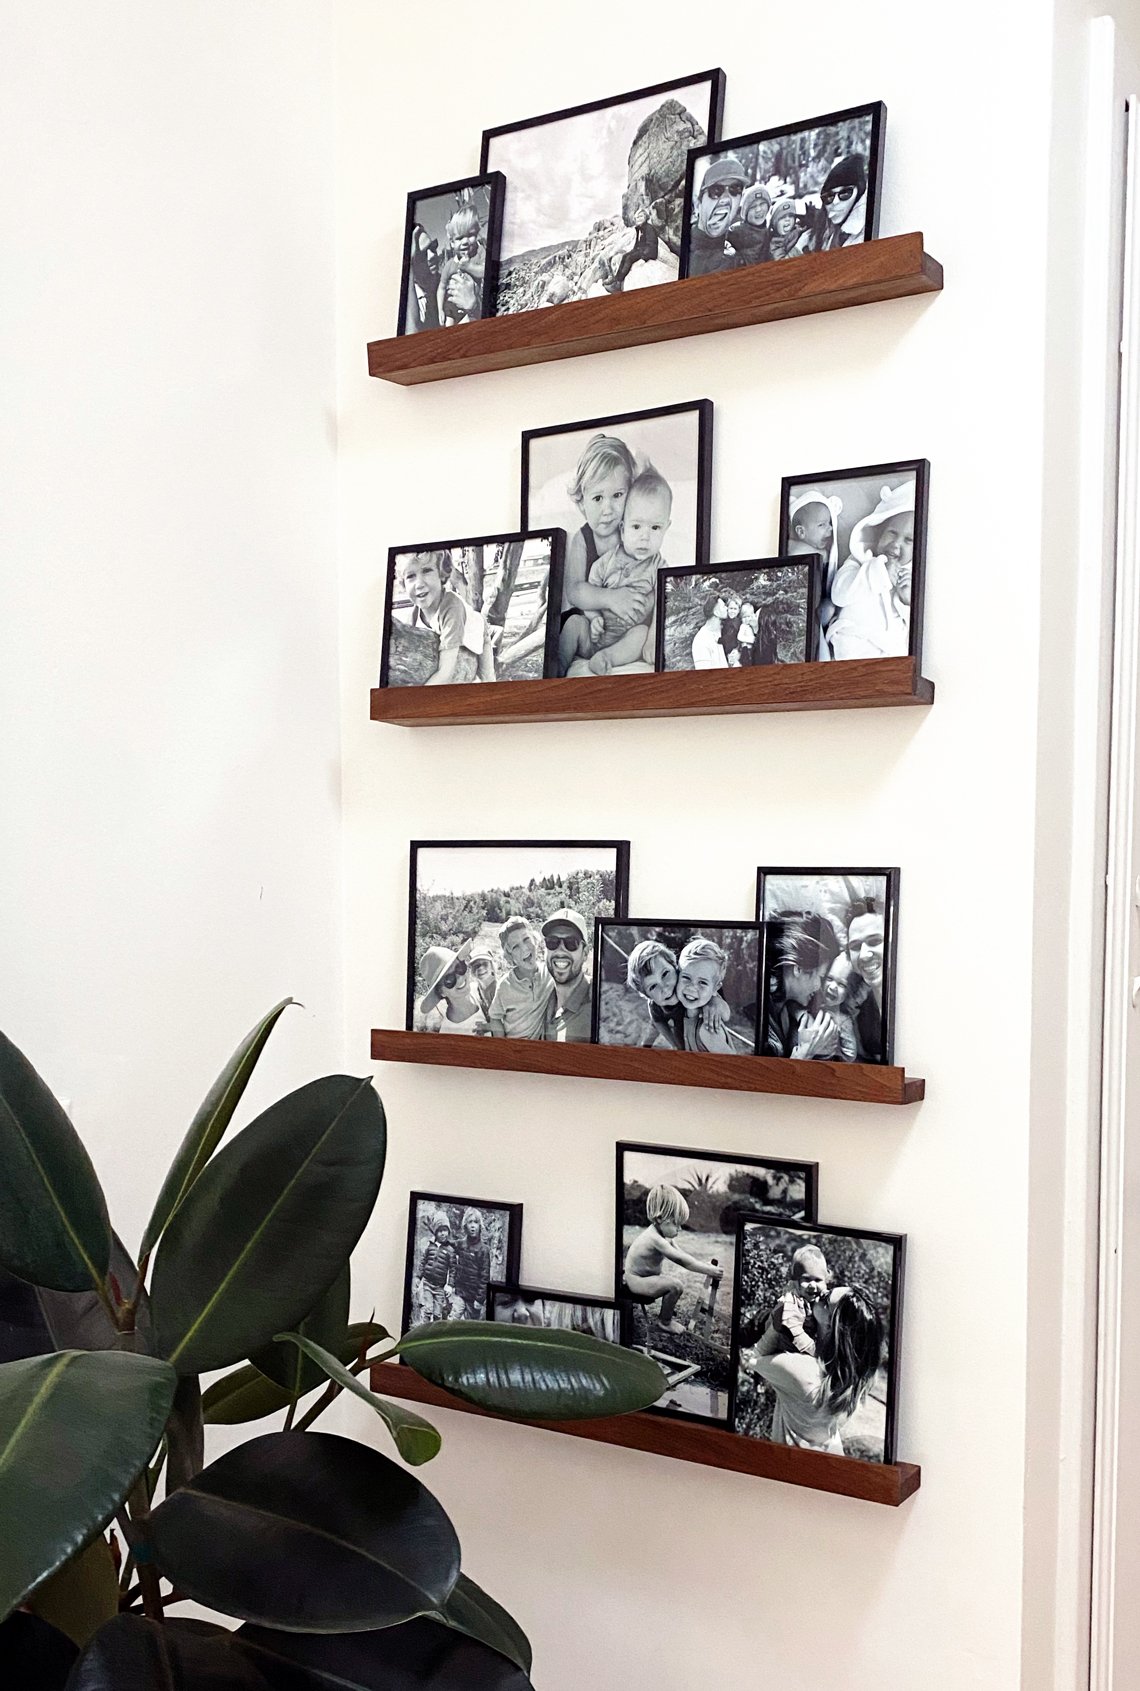
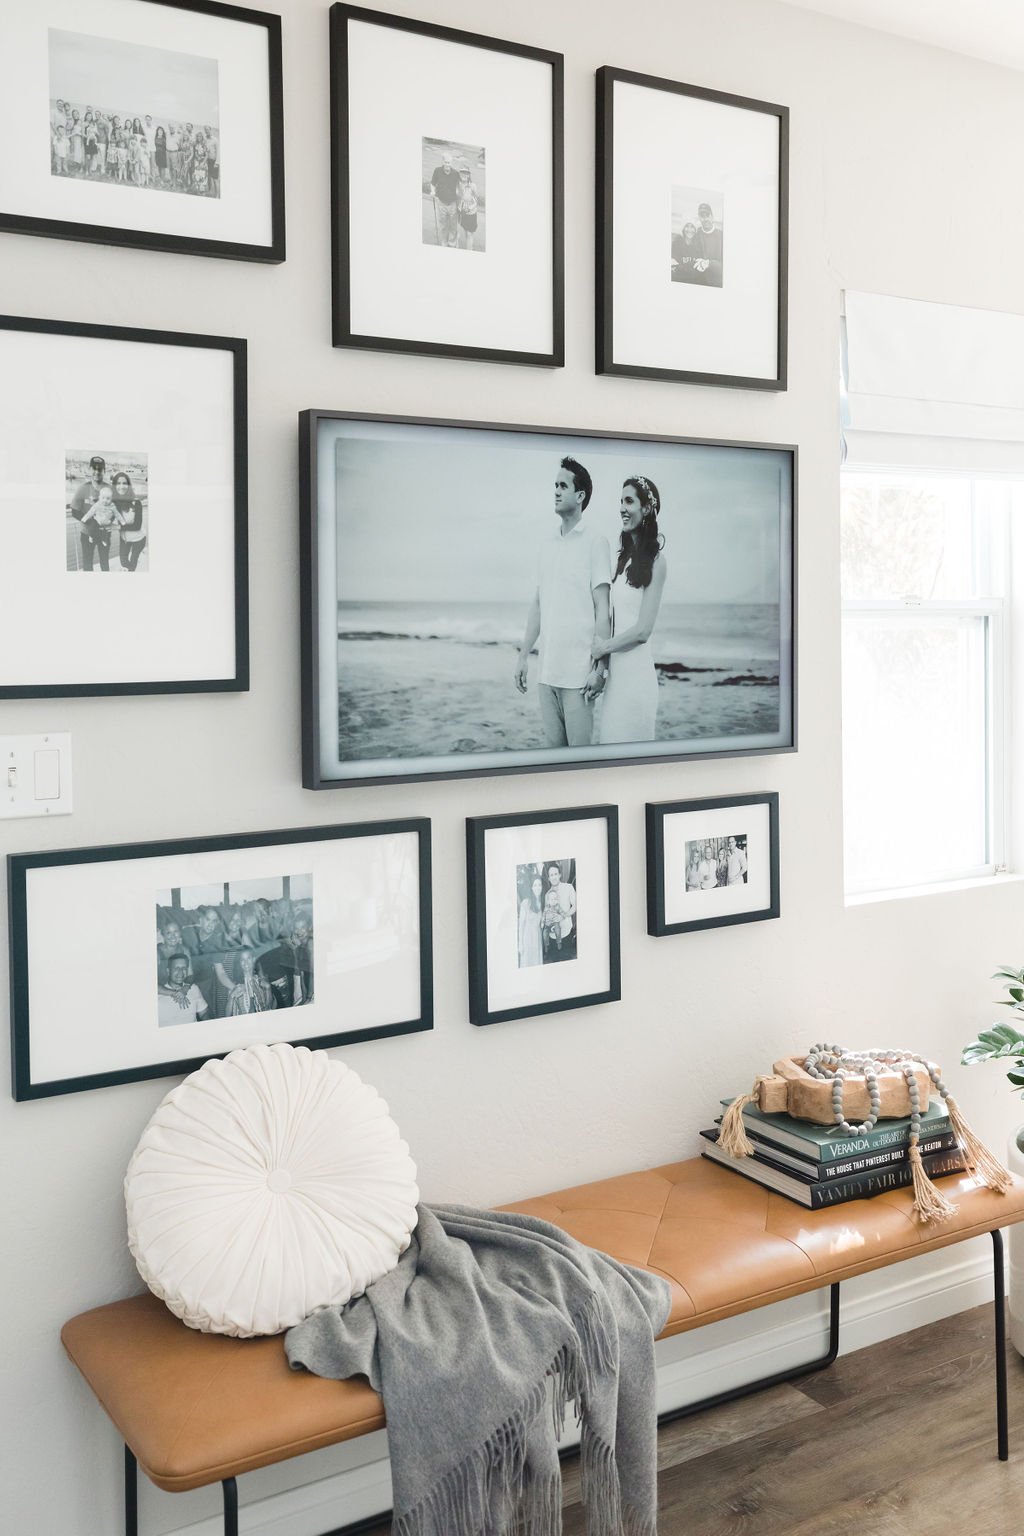
With all the picture ledges firmly attached to the wall, it was time to style them. I knew I’d need a lot of pictures, so to prevent the picture ledge gallery wall from looking too busy, I printed all the photos in black and white. Then, to add some interest, I varied the picture frame heights and sizes.
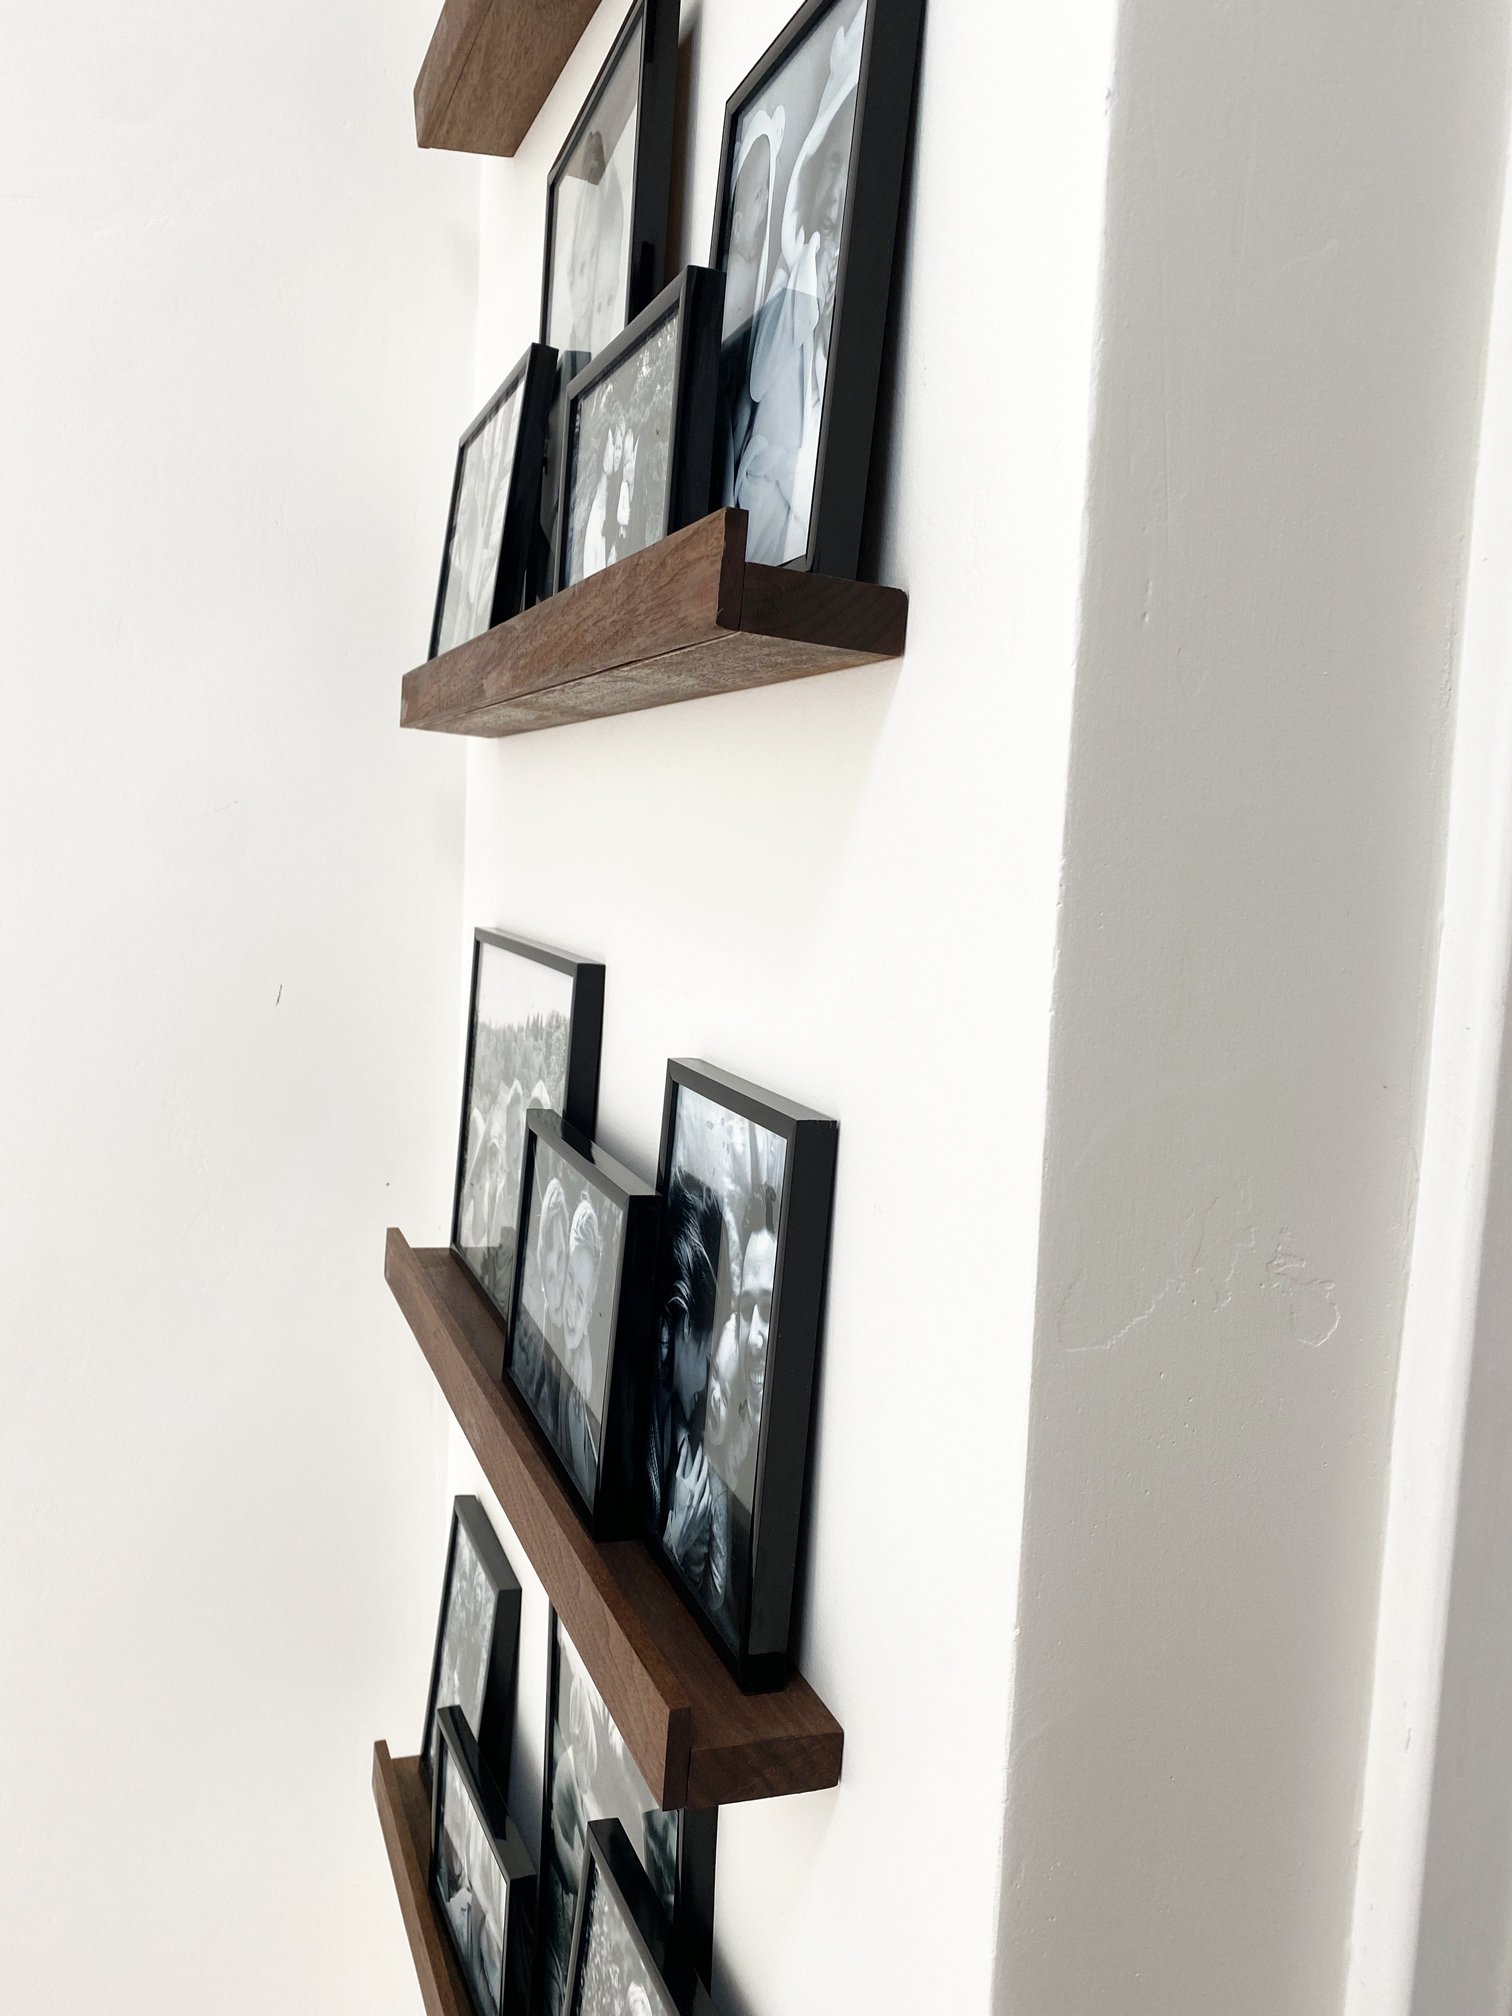
In the end, the picture ledge gallery wall I DIYd was quite shallow at 1.5” deep, meaning that only very thin, cheap frames would fit on top. In retrospect, I would have made the picture ledge a bit wider to accommodate heftier frames. But all in all, I love how this project turned out!
Option 2: Purchase A Pre-Made Gallery Set
Let’s face it—not everyone has time to DIY a picture ledge gallery wall. If you want to create a grateful gallery wall that’s ready to go, take a look at these options we curated:
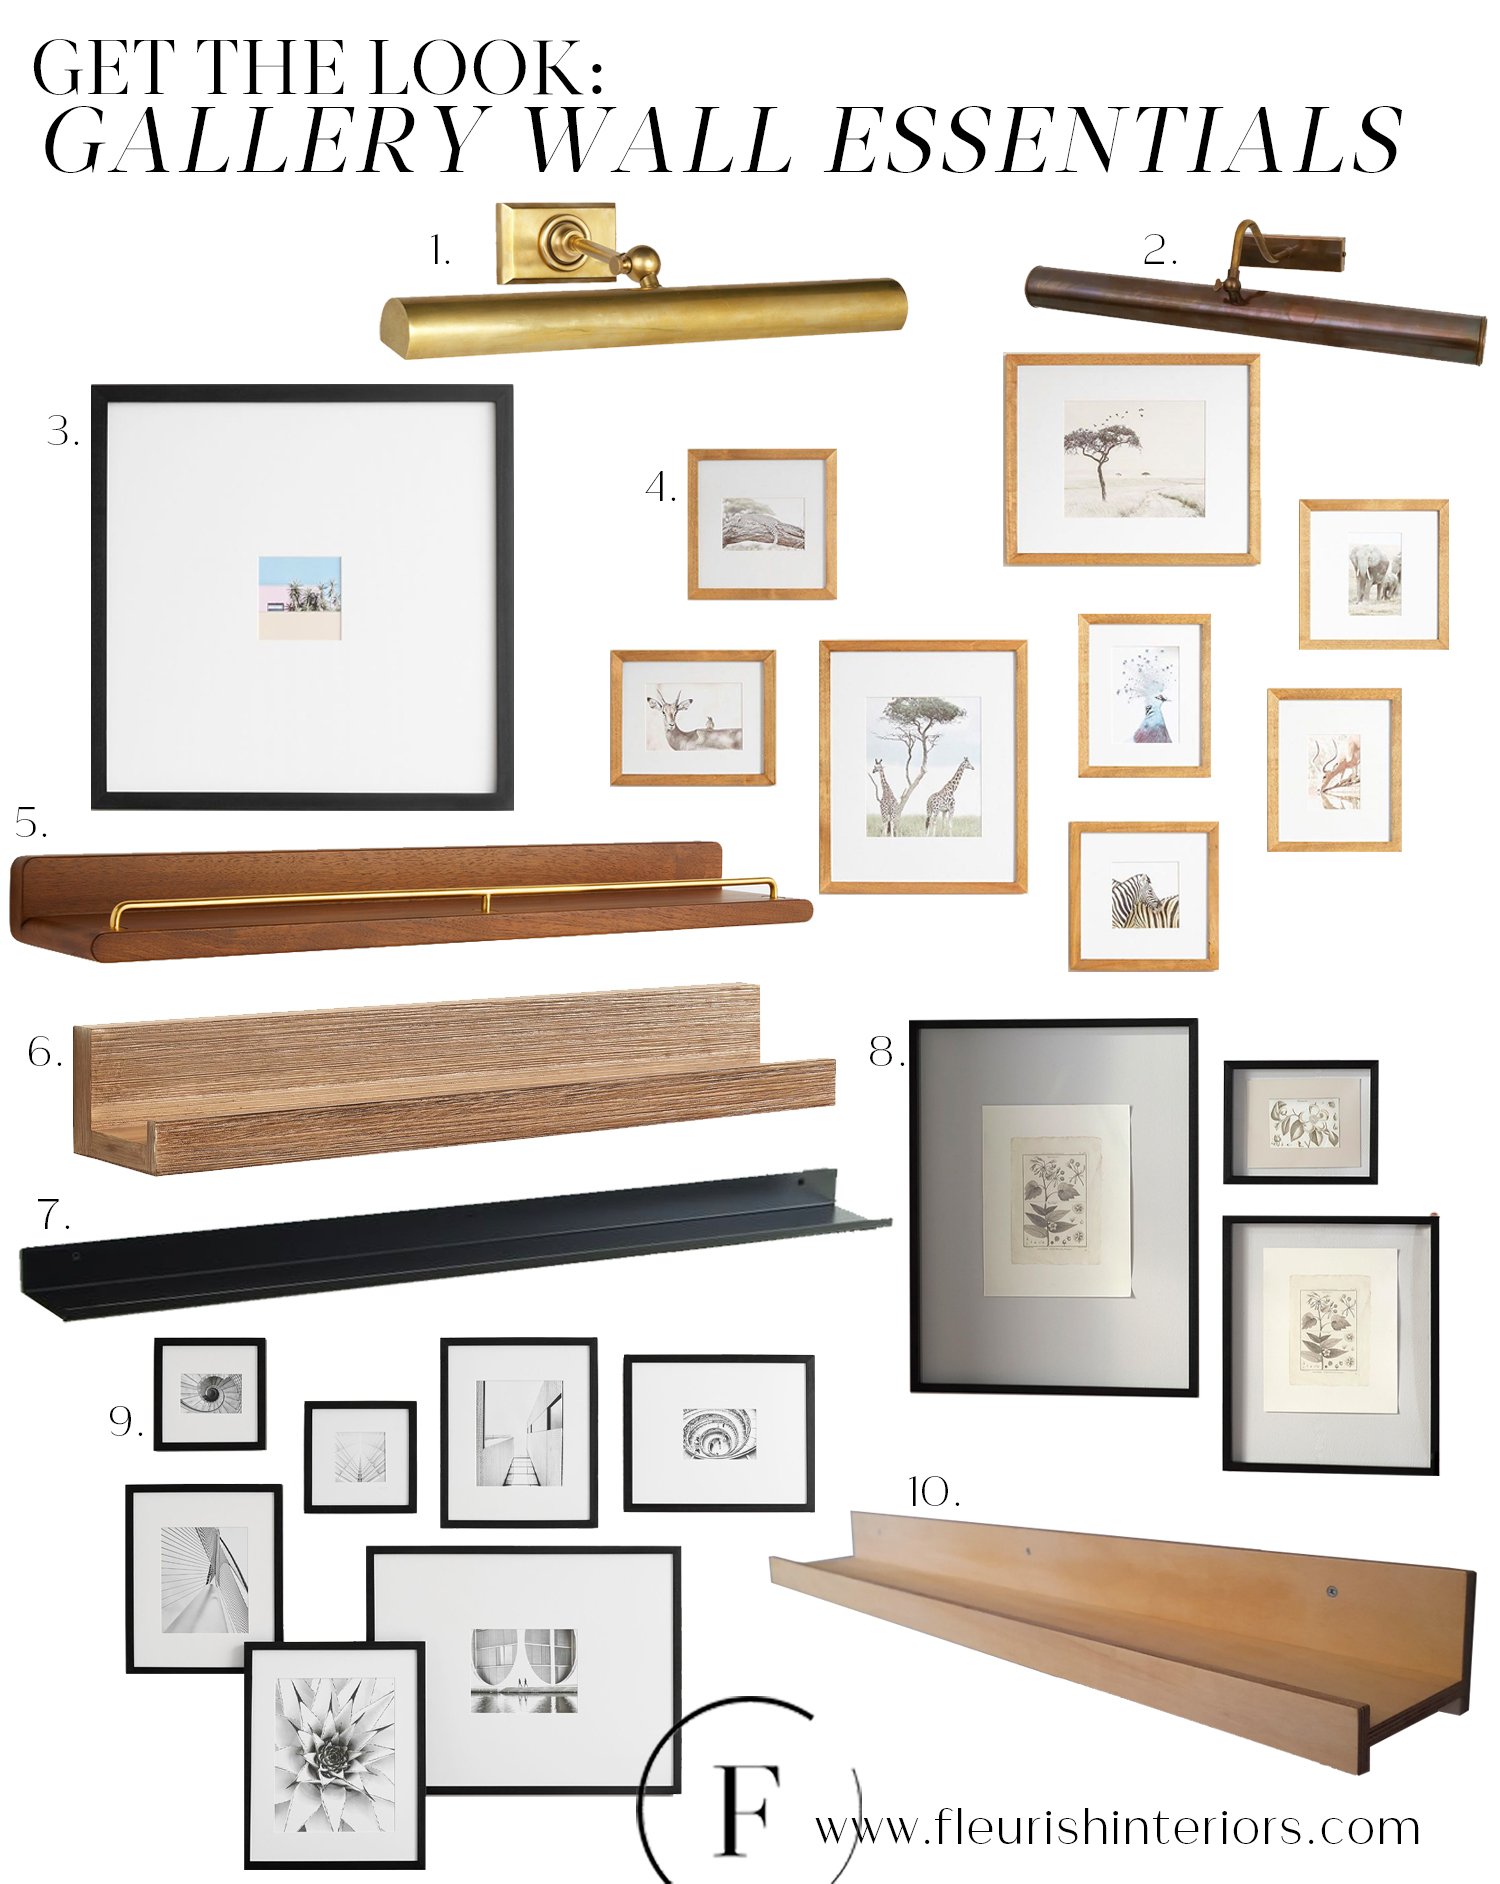
1. articulating picture light 2. fixed picture light 3. oversized mat frame 4. gallery set of 8 5. brass detail picture ledge 6. simple picture ledge 7. metal picture ledge 8. floating frames 9. gallery set of 7 10. plywood picture ledge
5 Gallery Wall Styling Tips to Consider
No matter which option you choose, keep these 5 gallery wall styling tips in mind:
Give everyone equal airtime. Make sure you balance the subjects of your gallery wall images. When I sorted through all the family photos on my phone, I realized my husband didn’t appear in half as many pictures as I did. Likewise, try to avoid printing 7 pictures of one kid and only 1 picture of another.
Keep color consistent. If you want to display photos from several different events or time periods, be sure to analyze the saturation of your photos. Some may be darker or lighter than others. One easy way to avoid this problem is to print all your images in black and white.
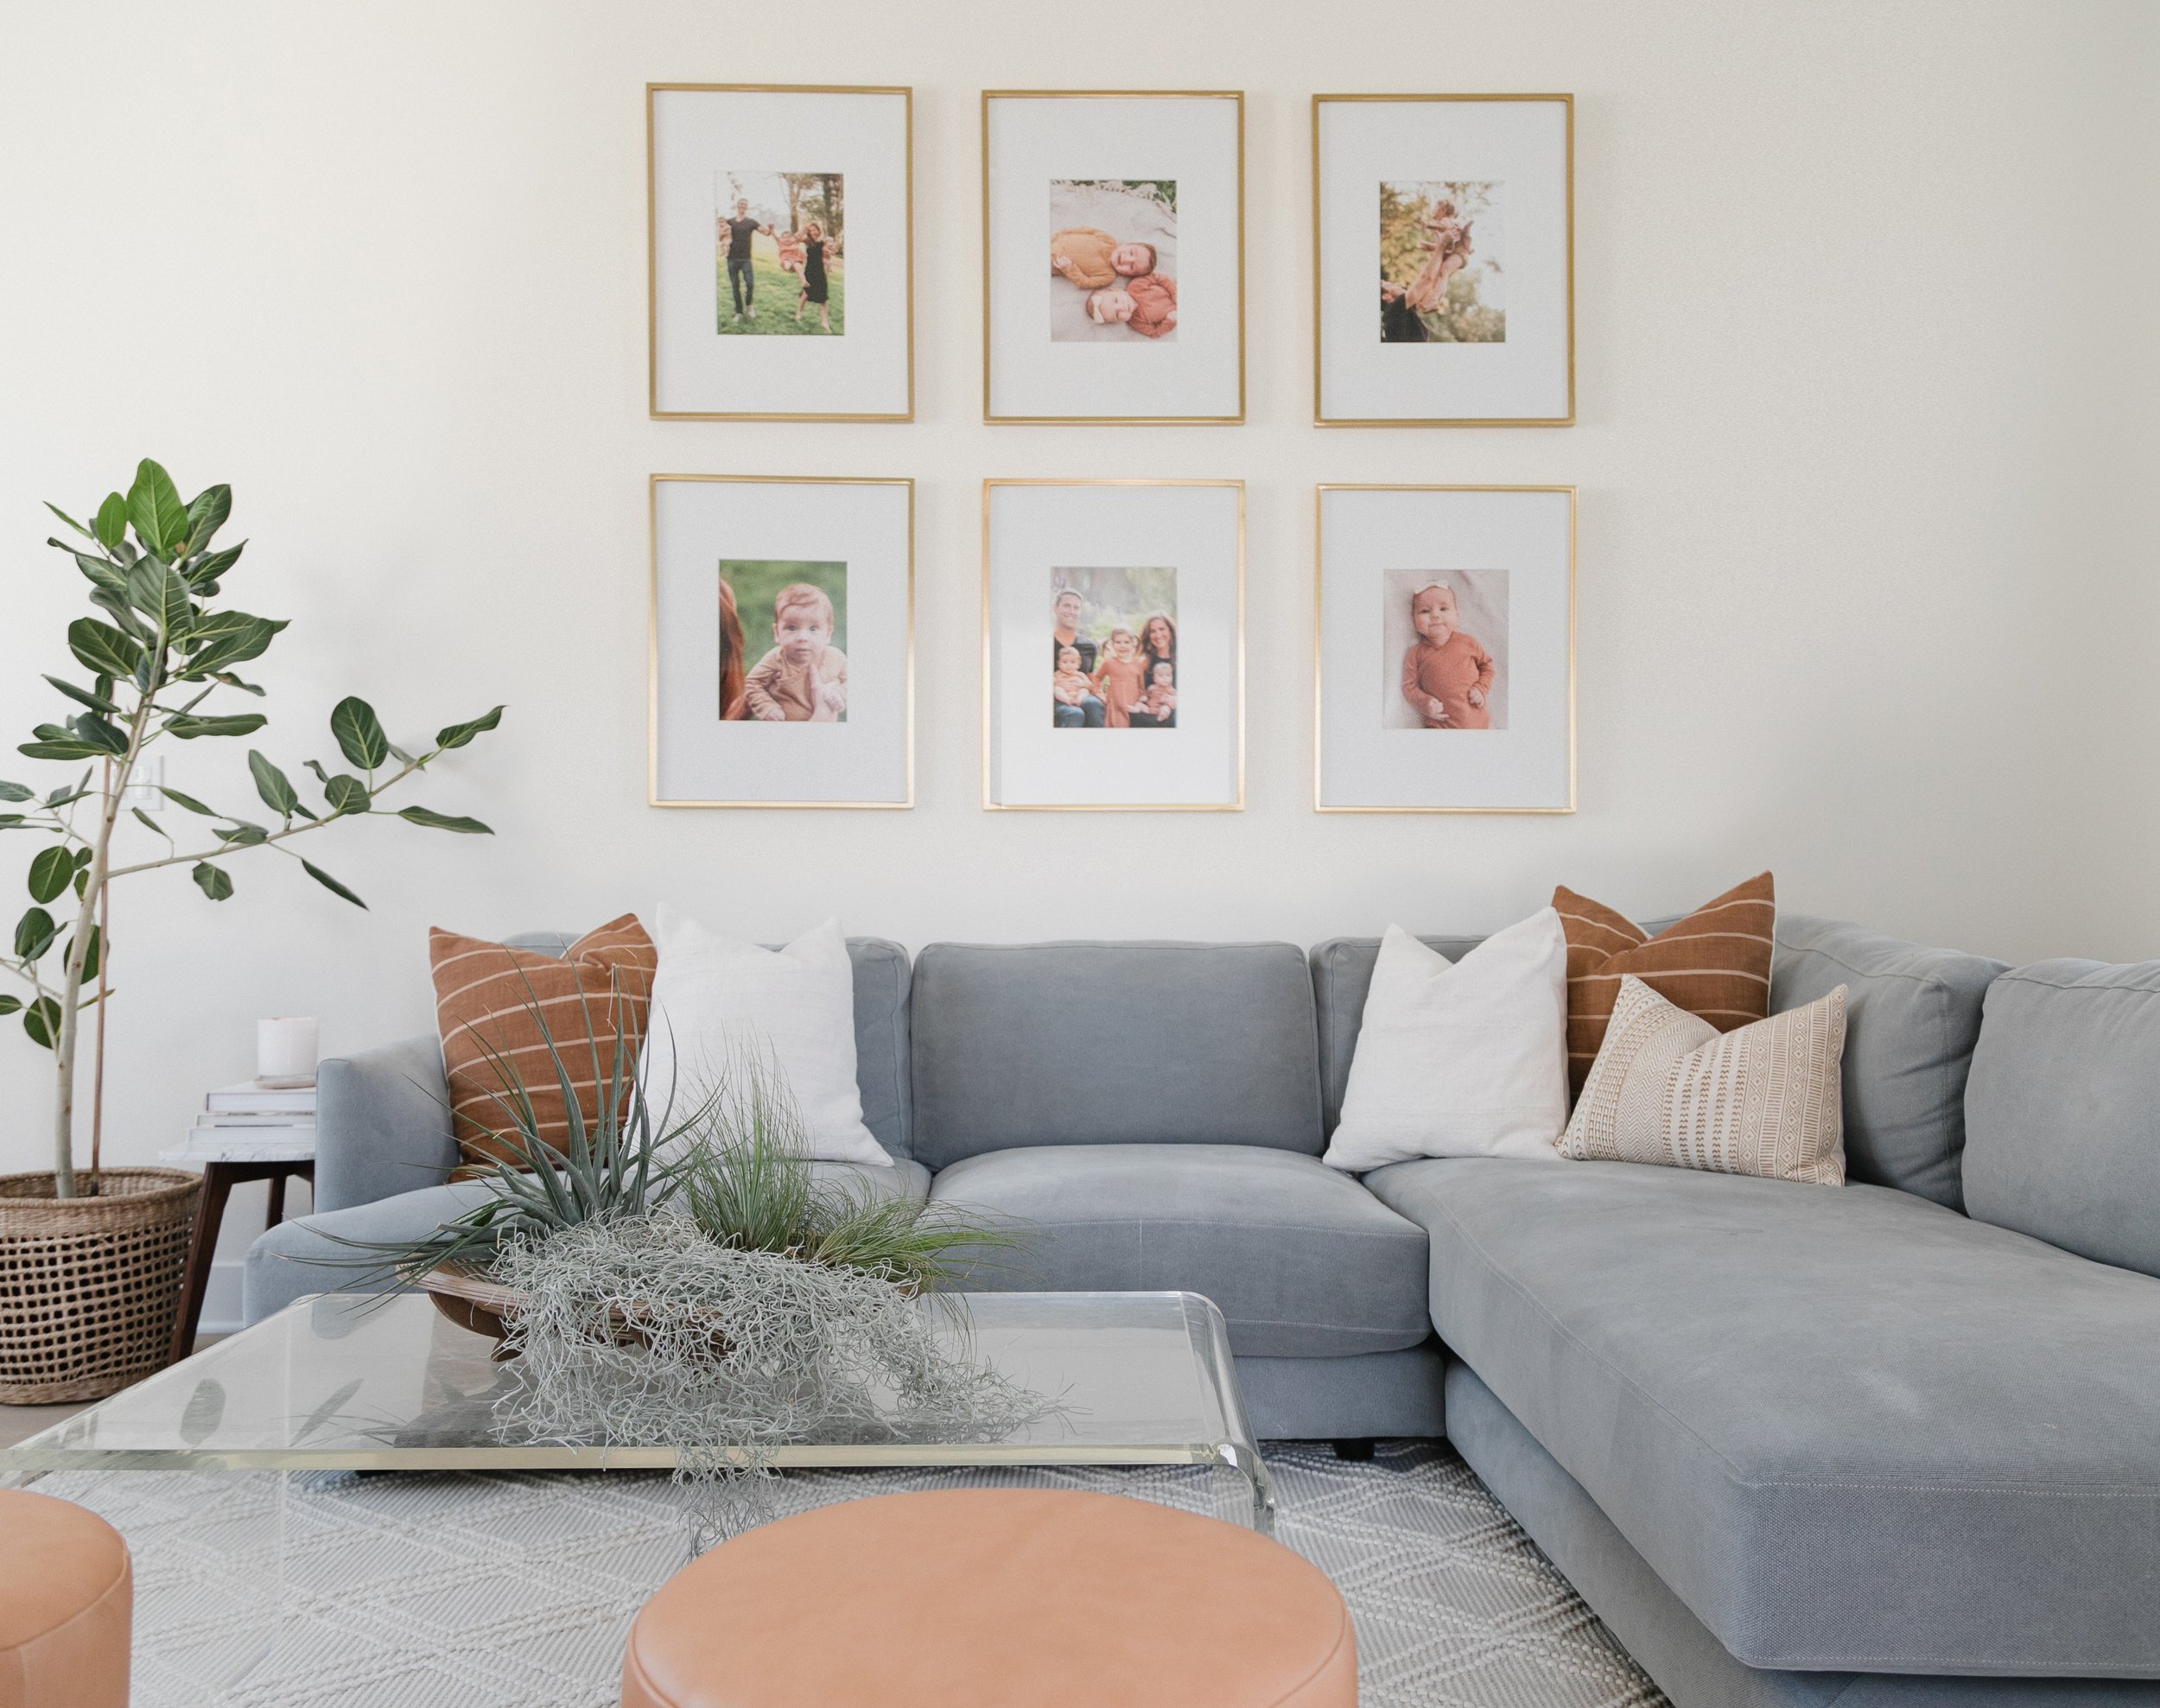
Consider the size of people’s faces. We like to either keep it very consistent or totally varied. If you are going for consistency, try to keep the subjects of your photos relatively equal in size. This gives the gallery a very clean look. Or, if you are going for variety like I did on the picture ledges, make sure there is a nice balance between zoomed out compositions and close up shots. This gives the gallery nice movement.
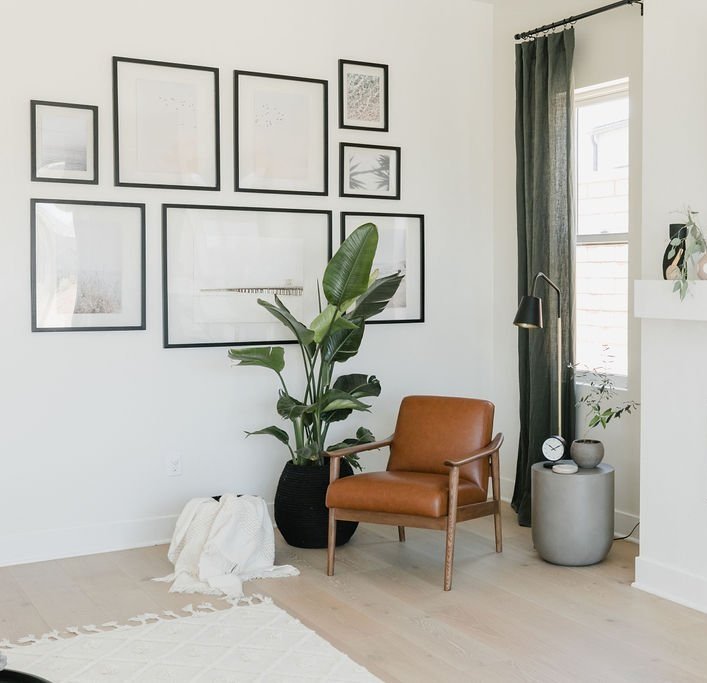
Balance frame orientation. If you aren’t purchasing a gallery wall set, you may struggle to decide which frames to hang vertically or horizontally. For help, we like to go on Pinterest to search for gallery wall inspiration, then duplicate the look with picture sizes available to you. Of course, if that feels too complicated, you can always create a grid of evenly-spaced pictures, like this gallery wall we made for a client.
Play around with your options. Hanging a gallery wall is not too difficult, but expect a little trial and error in the beginning. Before hanging anything, I like to play around with potential compositions on my computer using Photoshop or Keynote.
When I’m ready to print, I either run to Walgreens or Costco. They’re able to print small pictures as well as oversized images.
Want to extend that feeling of gratitude we all cultivate during Thanksgiving? Look at your most cherished memories every day by putting your favorite people, places, and things up on your walls. If we convinced you to hang a grateful gallery wall in your home this fall, show us your creations by tagging us on Instagram! We can’t wait to see what you create!